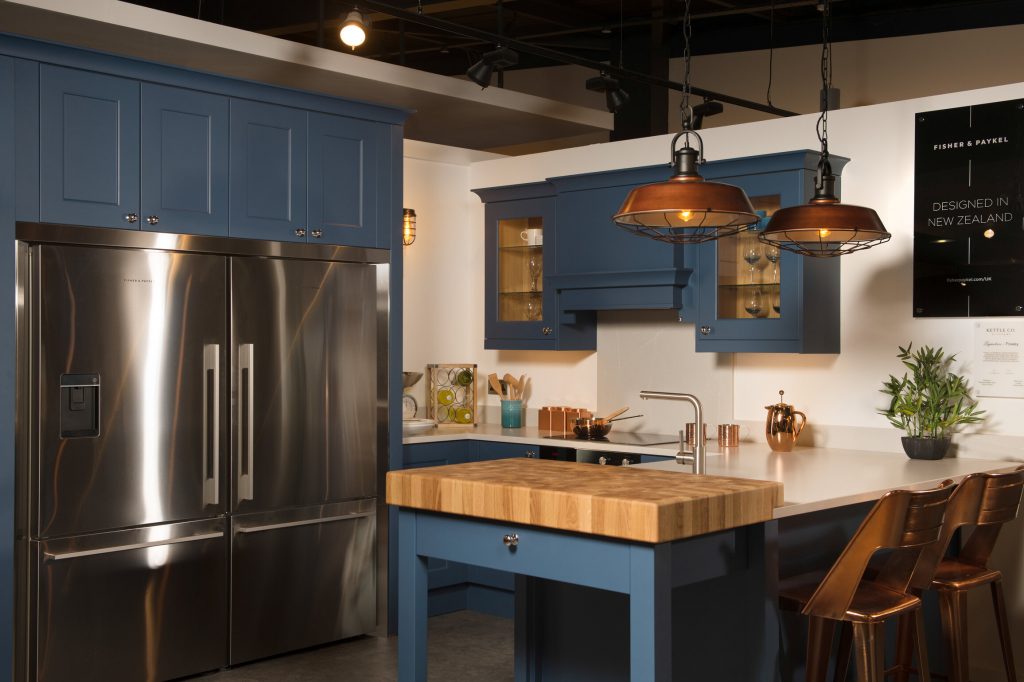
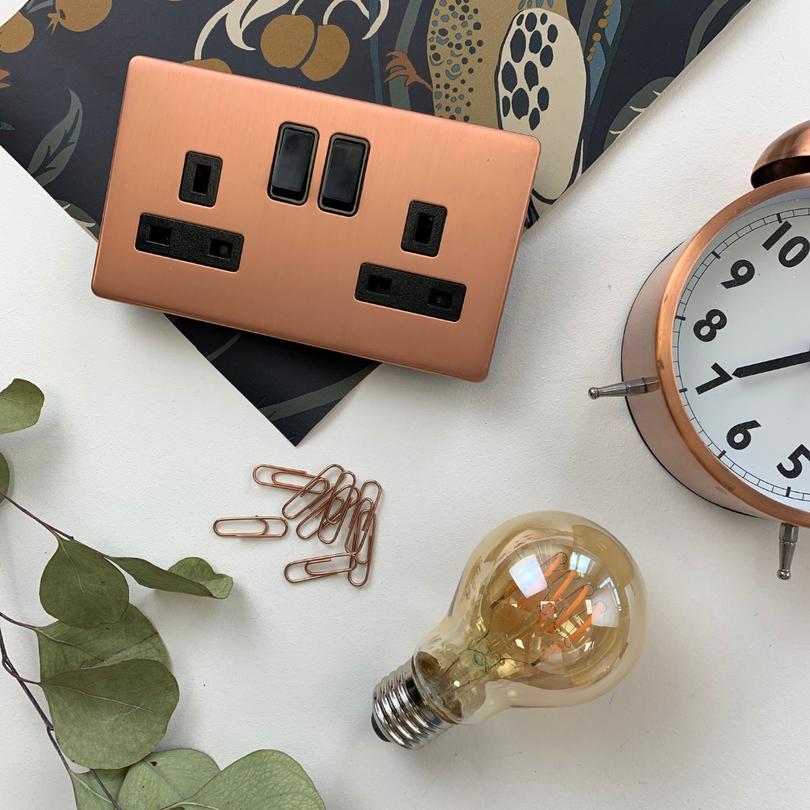
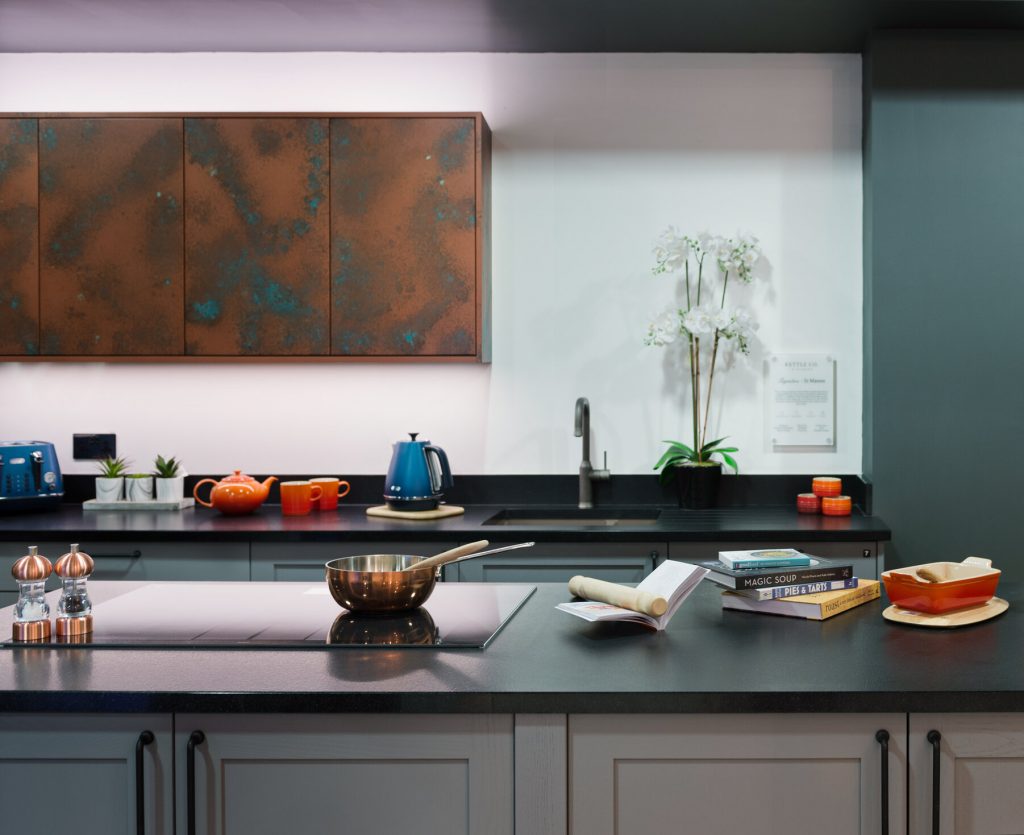
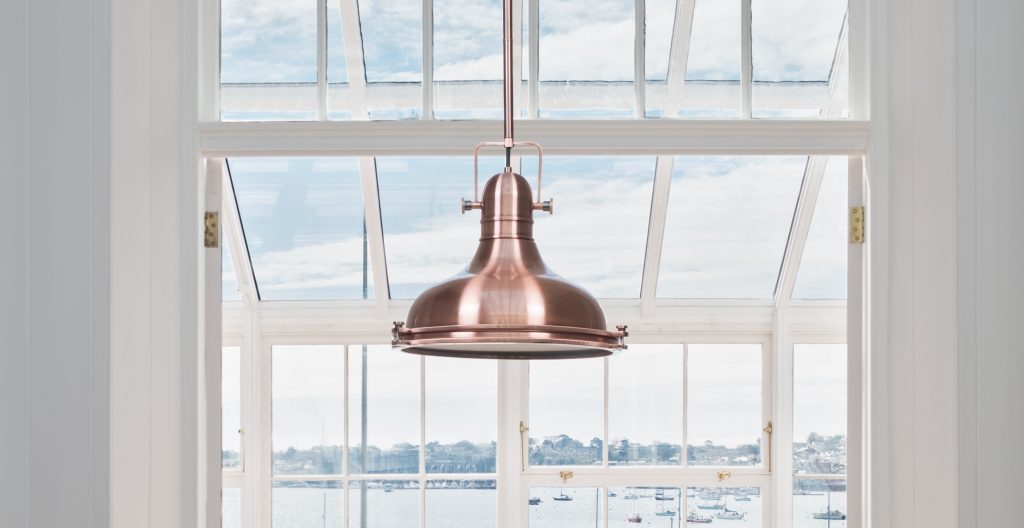
Integrating copper into your décor, be it a modern style or period, can add a warm and welcoming tone whilst bringing in mood accents. Much like bronze and gold, this warm metal can add a subtle glow and fits with many different colours.
Copper is a colour that is usually used sparingly through decorative elements to enhance a room, rather than crowd it. It's a colour that is commonly used for kitchen utensils like kettles, pots and pans. A splash of this beautiful finish can come in the form of a pendant light fitting, that reflects the soft tone. Copper downlights show off a modest amount of metal, and copper sockets and switches can be dotted throughout a home.
Copper tends to go well with similar colours and styles to rose gold as both share that distinctive red tint. Rose gold is an alloy - a mixture of copper, yellow gold and silver, so (depending on the ratio) tends to have a much softer appearance. Although these two finishes look similar, and can be interchangeable, it is better to stick to one when decorating your room, rather than using both. Read more about the differences between copper and rose gold in our blog: Rose Gold Vs Copper.
What Colours Go Well With Copper?
This is a fairly versatile finish, as it can go with a lot of different interior design styles, however there are certain colours that this metal really works well with.
As a general design rule of thumb, don't mix copper with bold colours like bright red or yellow as they will clash with the finish. Pastel colours are usually a perfect complement.
Blue
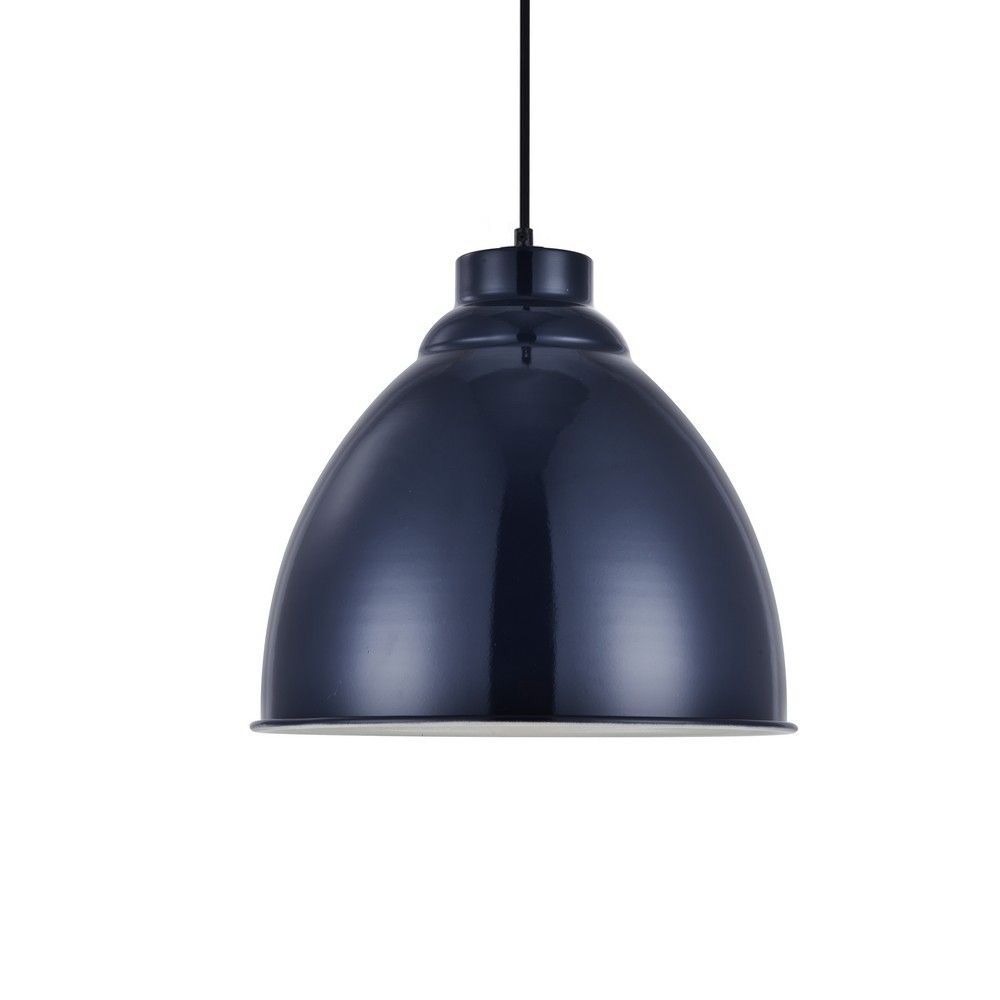
There are a number of shades of blue that work really beautifully alongside copper. Cobalt blue stands out and really creates a centrepiece. You could try a blue rug, or sofa alongside copper plant pots, tables or floor lamps.

Navy blue brings an even deeper tone. This complements many warm metal finishes, and can be more subtle.
Image: Pinterest
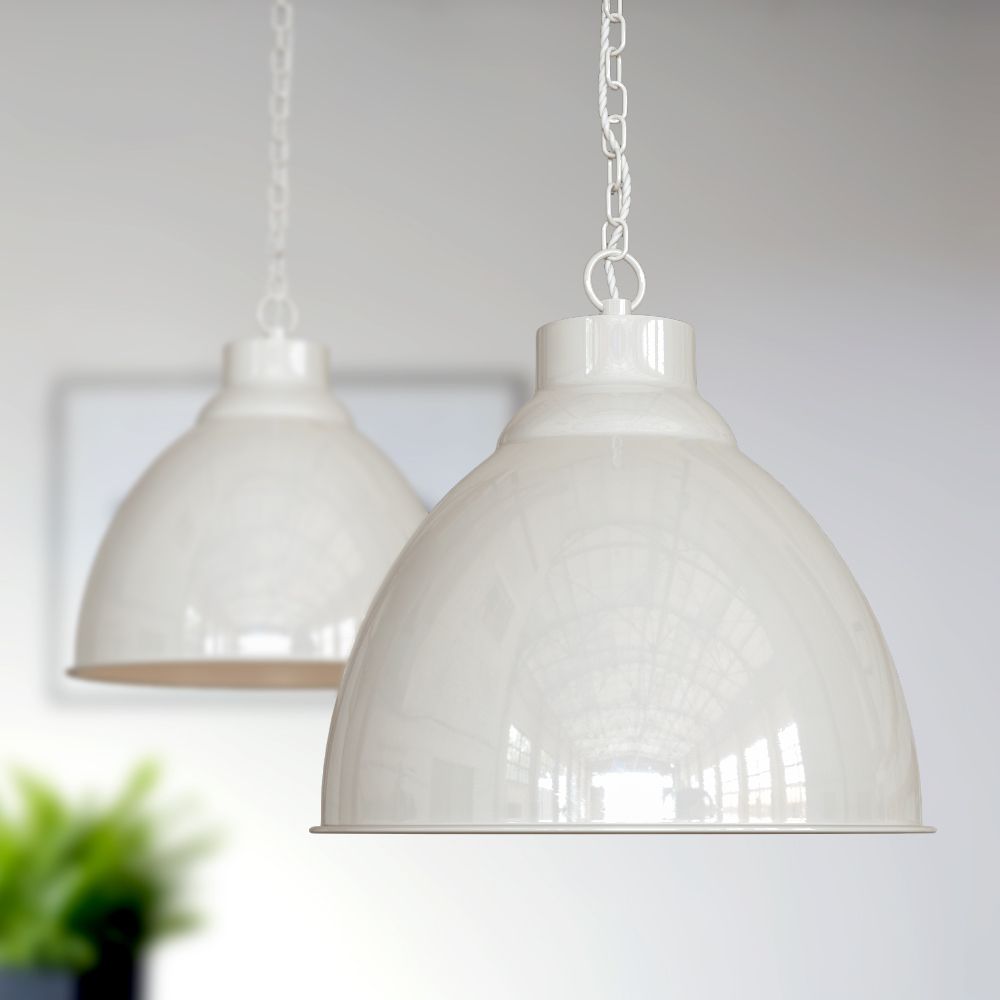
White
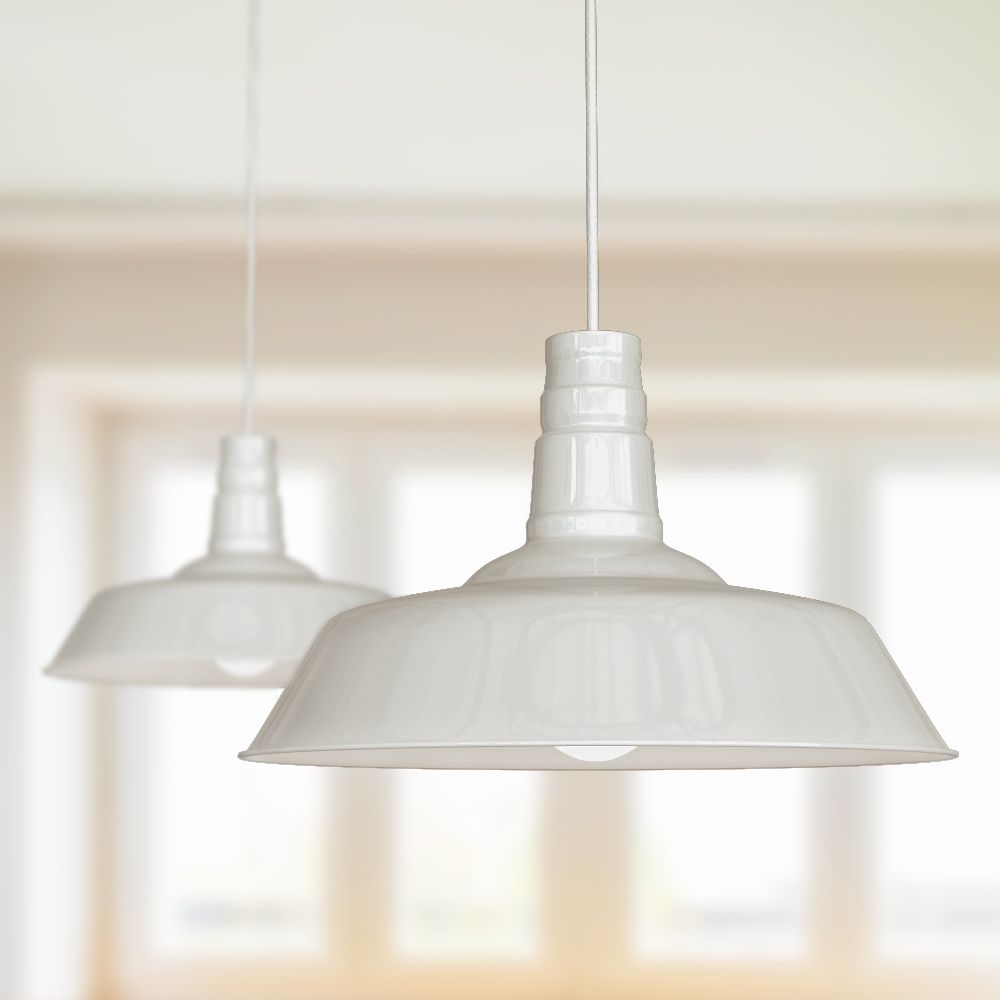
If in doubt, there is always white. White still remains a popular finishing colour in a home as it provides bare foundations to bring colour into your home, be it living rooms, bedrooms, or kitchens, through furnishings. Pops of copper against white creates a striking and modern finish.
You don't need to stick with a classic, pure white on your walls. More of an off-white colour would work perfectly, just like the colour of our clay white lighting.
Grey
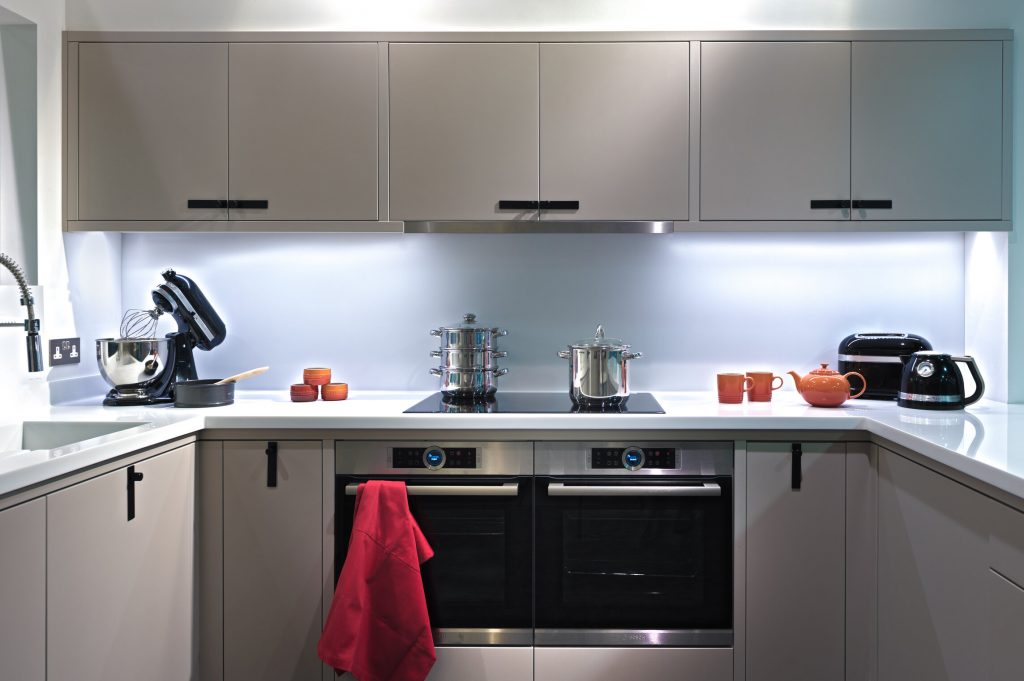
Much like white, grey offers a more neutral alternative to other colours, whilst still complementing the warms and glow of the finish. Grey is a smart choice if you're wanting the copper finishes to make more of an impact in your home.
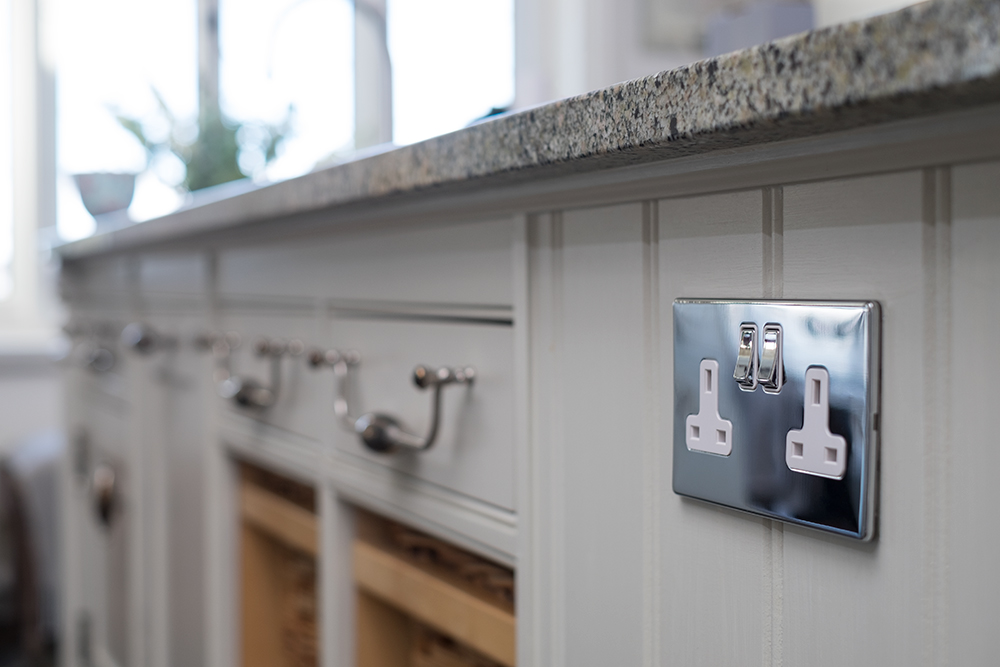
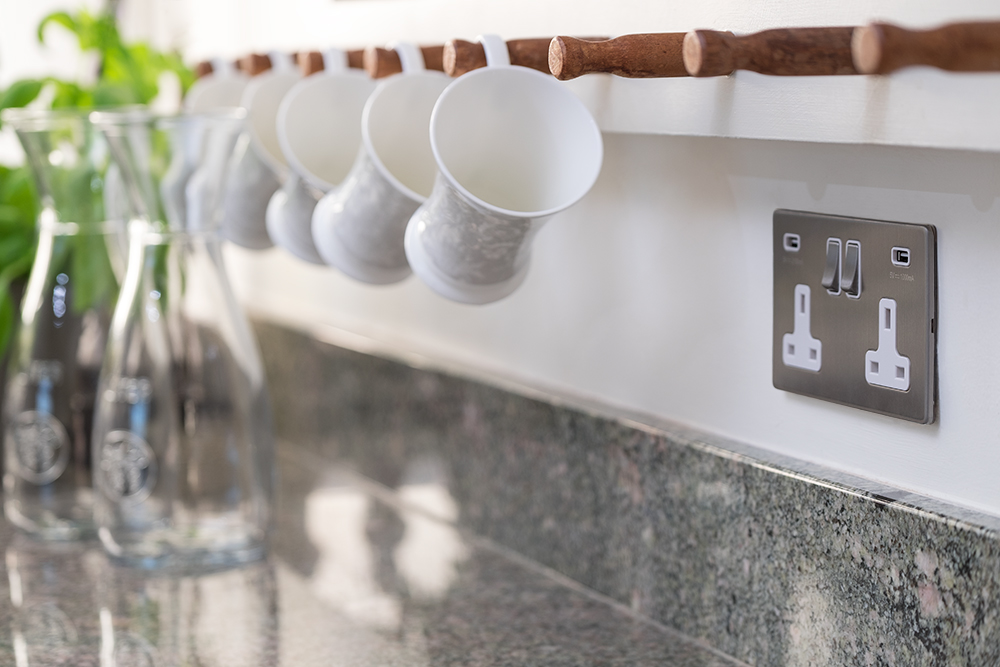
A grey painted wall looks wonderful with a brushed copper socket or switch, however, a surface that displays a mixture of grey tones, for example a stone kitchen worktop, can look great underneath copper utensils.
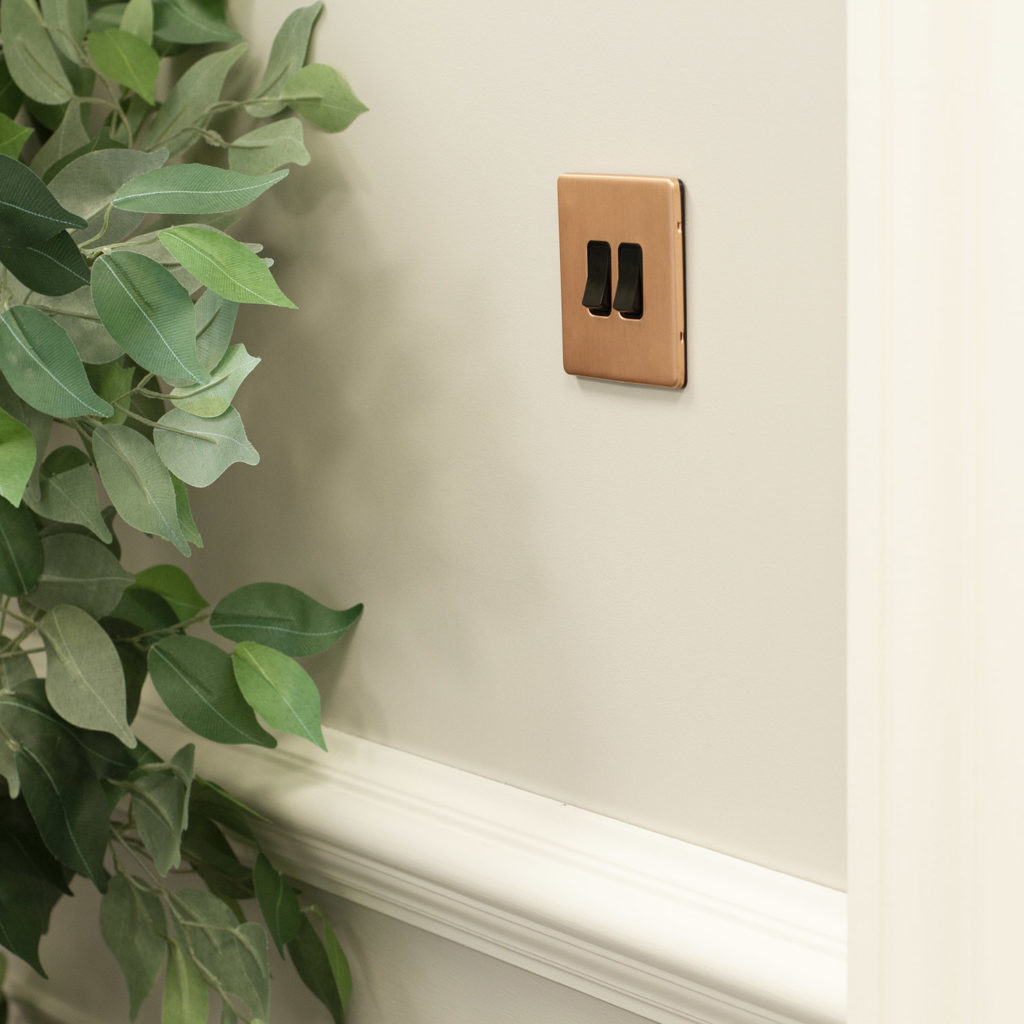
Green
Much like blue, darker tones of green tend to go well alongside this versatile metal. This presents a very formal or professional appearance, which can work well in small offices.
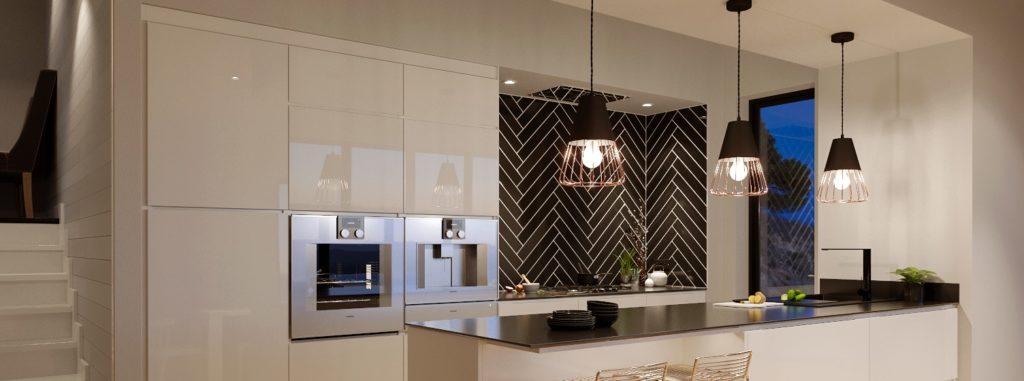
Pops of copper against some luscious greenery provides a gorgeous combination. Perfect for kitchens, home offices or living rooms.
Wood
As well as different colours, this stunning metal can look beautiful surrounded by wood, for a really rustic, natural style.
Marble
It's the millennial combination that has littered the boards of Pinterest over the last few years. Marble pairs beautifully with this rich metal. This is something commonly seen throughout kitchens and home offices.
Copper is an incredibly versatile metal that complements a wide range of colours. Think less is more, a few subtle touches will the lift the colour in any interior.
[related_products is_auto_added="1"]Copper is an incredibly versatile metal that complements a wide range of colours. We explore what colours go well with copper for your interiors.
In our Kitchen Lighting Guide we explored all of the different key considerations you need to make when choosing the right kitchen sockets for your space. With the lighting to hand, let us turn our attention to the interior hardware choices.
Sockets and switches offer functionality and service, time and time again. It could be argued that your sockets and switches are one of the most used, appraised and touched items in your kitchen.
The offering of sockets and switches reaches far further than plain white plastic these days. It's time to treat your interior finishes in your kitchen.
Matching The Finish To Your Kitchen Decor
Letting your interiors lead the way and inspire your socket and switch combinations will help to achieve a seamless look to match your interior design. Be it modern, traditional or period.
Your interior hardware fittings can make or break the finished look, whilst they might be small, the impact they have overall can be huge.
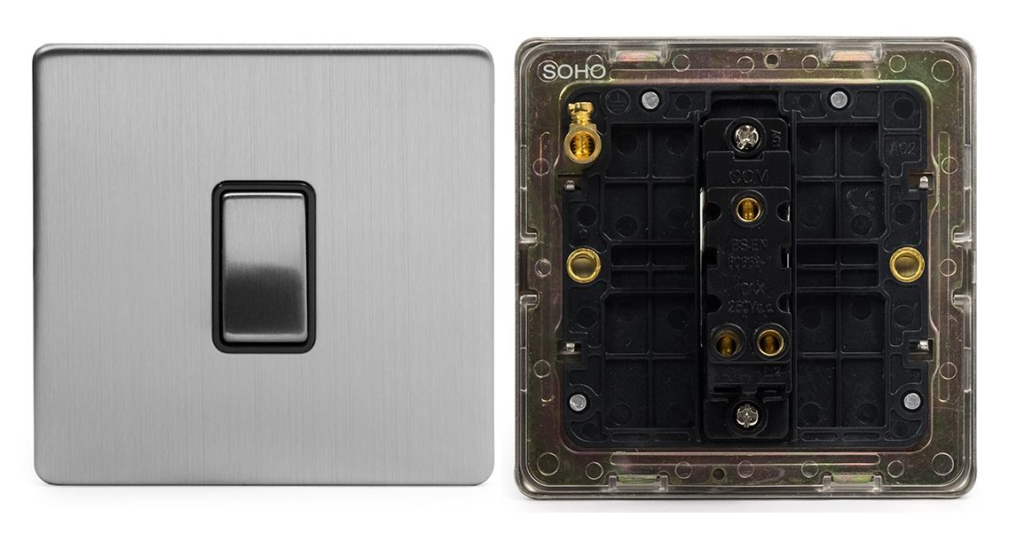
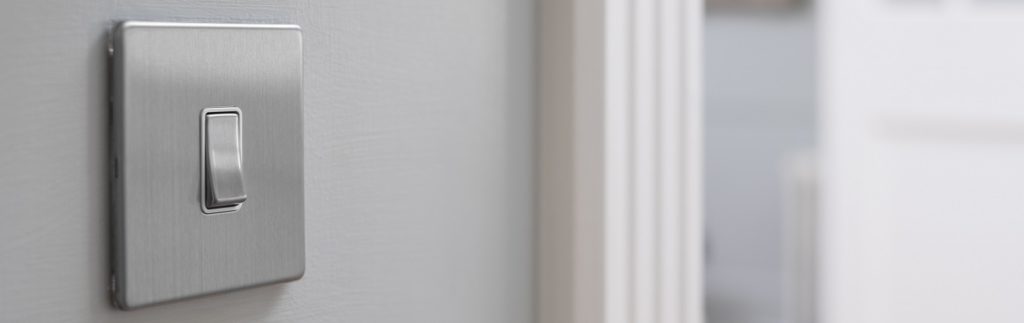
It goes without saying that white plastic and white metal are perfect for modern interiors. They are practical and hardwearing. Most of our range comes with screw caps included, this means you can achieve that almost screwless like appearance for that streamlined look when in situ. For something a little bit trendy and sleek, Black Nickel sockets and switches are well suited to modern kitchens.
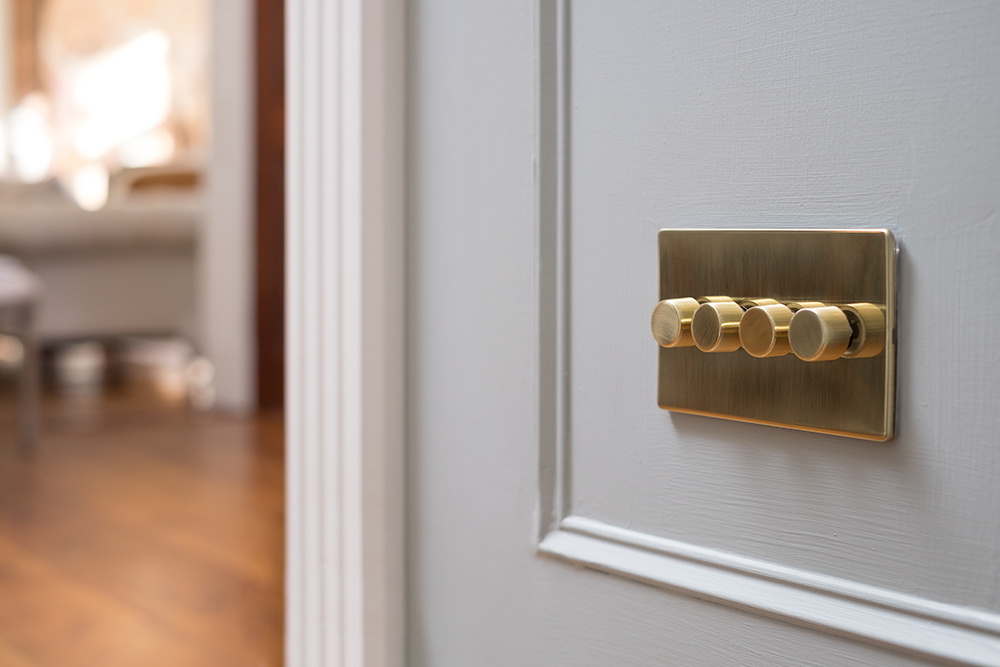
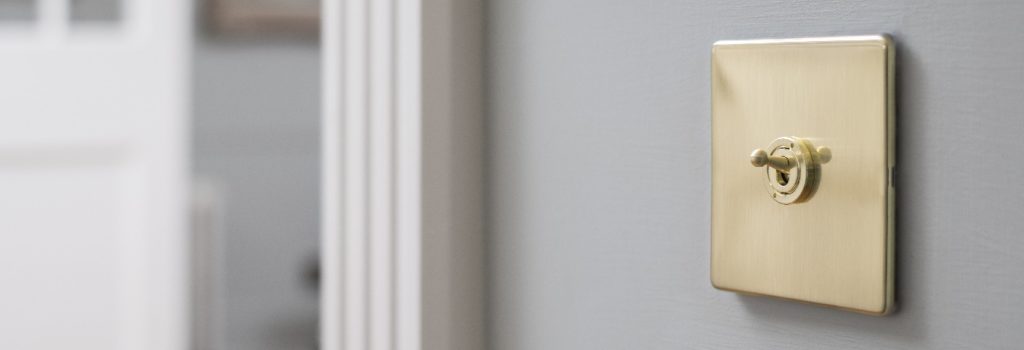
For period and rustic homes, both Antique Brass and Brushed Brass are design assets. Matching them with other interior fittings such as kitchen taps will help to create that styled finish throughout.
Brushed chrome is well suited to contemporary homes. With Polished Chrome generally considered to work well with the style of most homes. Polished Chrome mimics a mirror like effect and can be stunningly aesthetic once in place.
Whilst functionality should be a key factor, letting the design type become the major deciding factor will ensure that your fittings work seamlessly and become a design asset, rather than an eyesore in your kitchen.
Sockets And Switches Functionality
Functionality is still key when it comes to sockets and switches. They're going to be used multiple times per day so they need to be able to do what you need them to do.
Switches
How you choose to light your kitchen will also help lead your choice with switches.
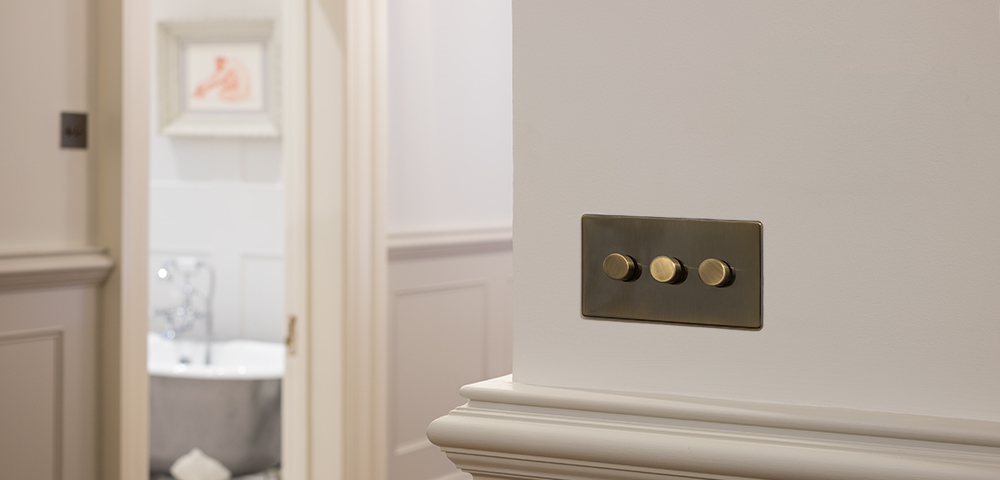
If you're wanting to create an ambient lighting setup then a dimmer switch will help you achieve this. Dimmer switches give you the opportunity to dim or brighten the lighting in your home. They look stylish when in situ too.
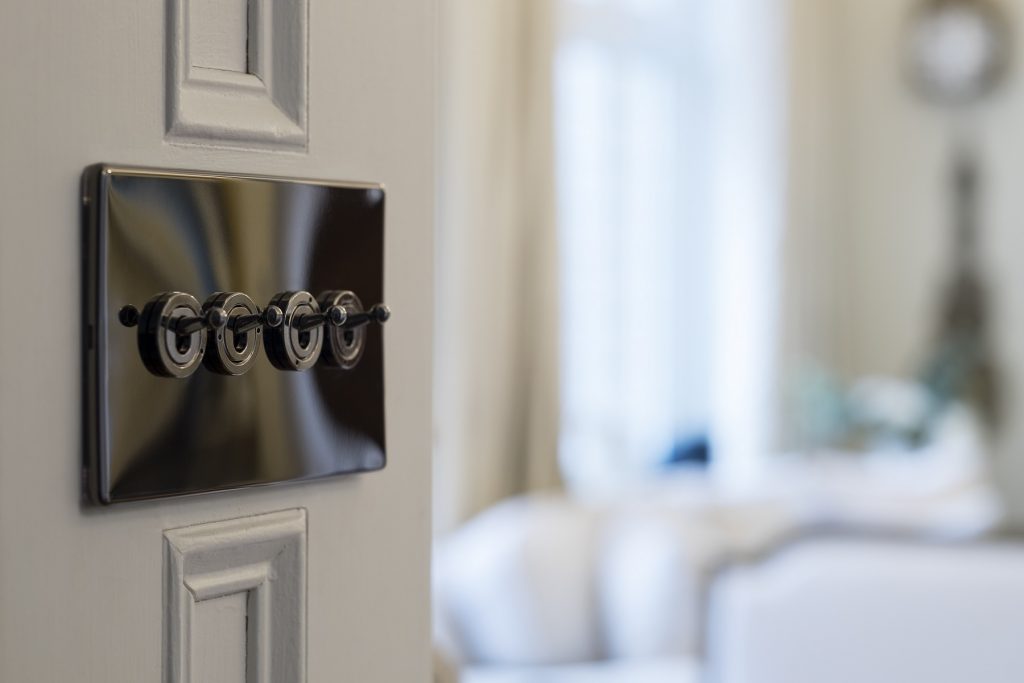
For period style properties, toggle switches are perfect for a more traditional look. Our toggle switches ooze luxury and style, match them with the sockets in the range for a streamlined look.
Sockets
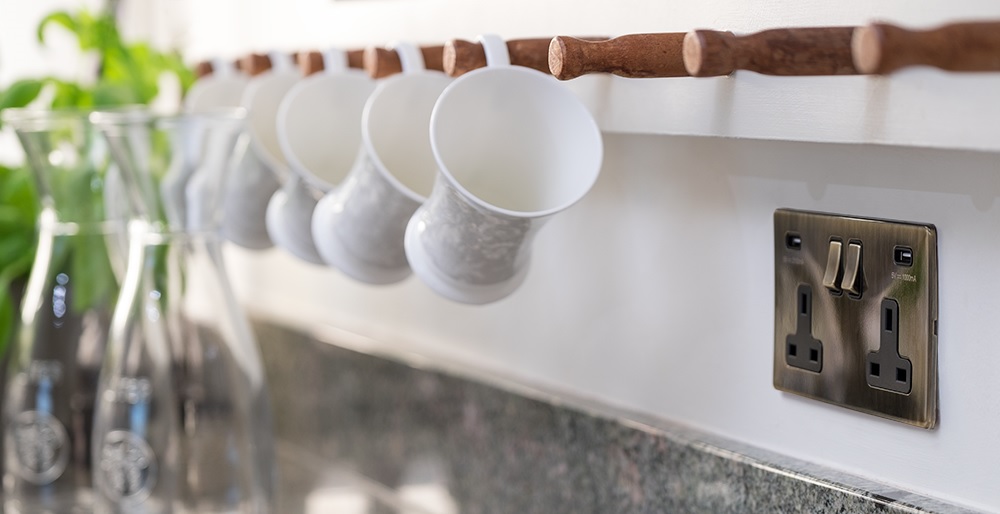
If your kitchen is one that often doubles up as a work station, then opting for sockets with USB ports is a practical choice. Integrated USB ports are a great way to streamline device charging by removing the adapters. It also allows you to double up what you charge if required.
Our sockets with USB are available across all metal finishes.
Take a look at our extensive range of sockets and switches to fuel your interior inspiration.
FAQs
We have a guide to help you place your sockets and switches safely in your kitchen. Read our guide here to find out more, but always consult an electrician if you're unsure.
Your interior hardware fittings can make or break your kitchen. Whilst they might be small, the impact they have overall can be huge.
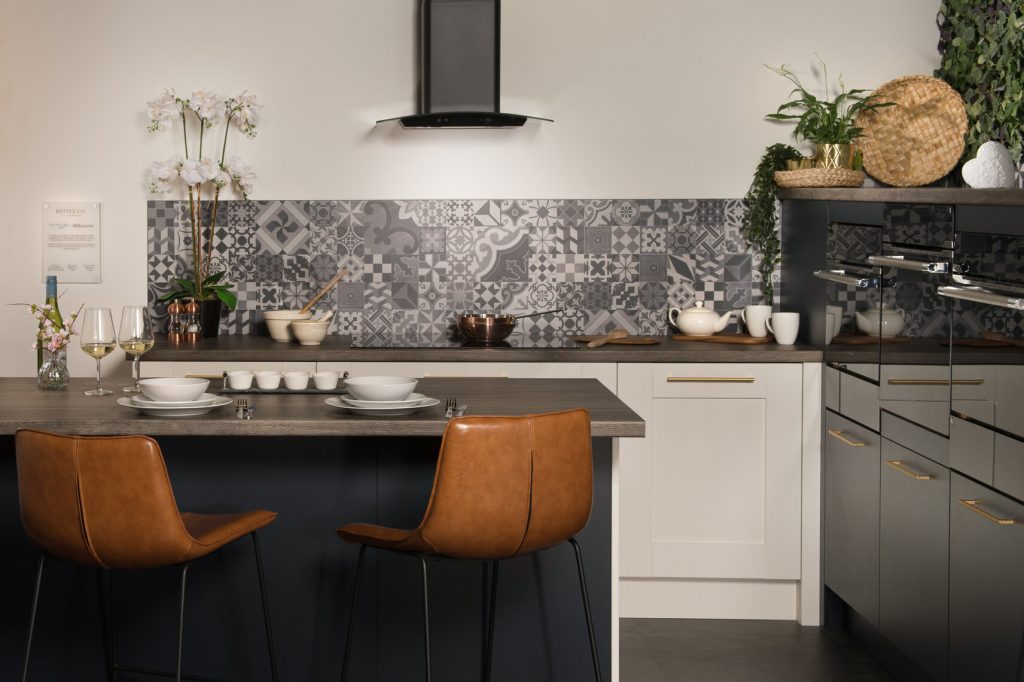
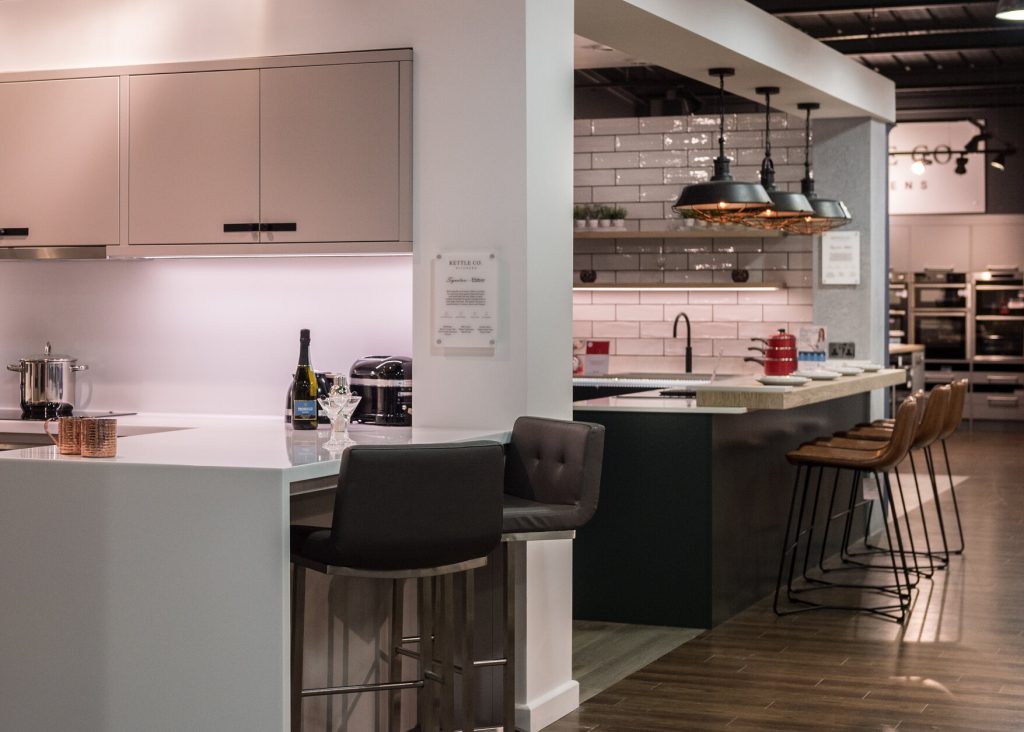
Pictured: Kettle Kitchens Co
A kitchen is the heart of any home. A place where a lot of time can be spent together socialising, eating and even, working!
There's no denying it's the functional hub of a home. Lighting your kitchen effectively is so important. Combining practicality and style, whilst creating the right atmosphere.
Here are some key considerations to make when choosing the right lighting for your kitchen.
What Are The Different Types of Kitchen Lighting?
It's important to know the different types of kitchen lighting. This will enable you to make the right lighting choice based on what it will mostly be used for.
Task Lighting
Task lighting refers to lighting that illuminates onto a target object that will help you to carry out a particular task. In a kitchen, task lighting is a popular choice on main working areas such as a hob or kitchen worktop.
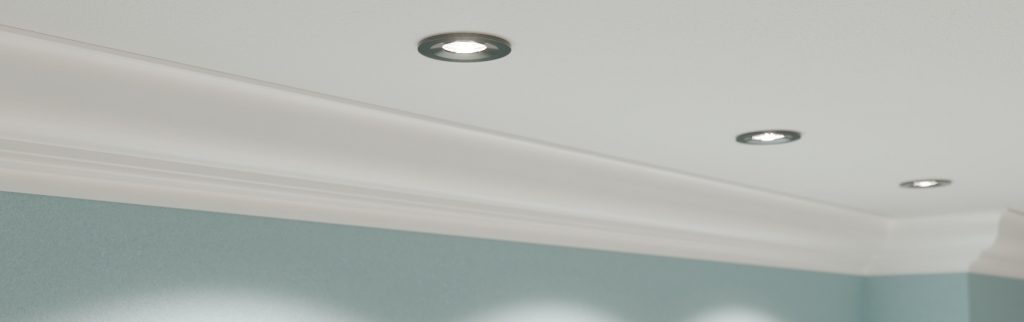
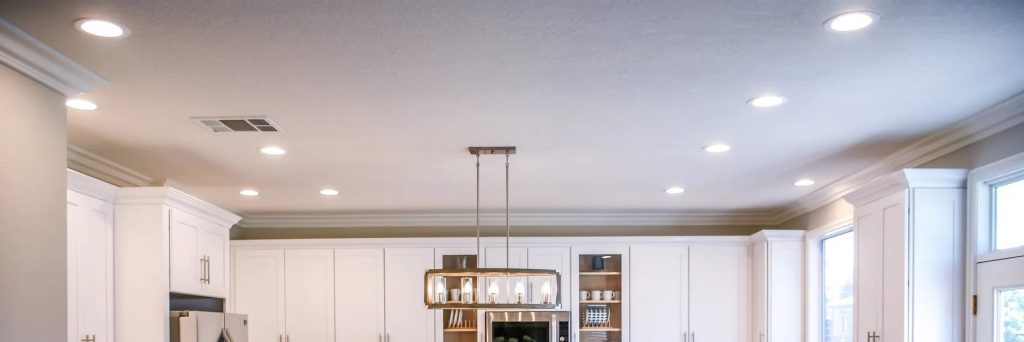
Bright, focused task lighting will make your life much easier in a kitchen. This can be achieved with carefully placed LED downlights, especially tiltable downlights which allow you to focus the beam on the working surface.
Downlights are fantastic for creating effective task lighting. In addition, LED strip lights above worktops are a great alternative for lighting up the areas that need it most.
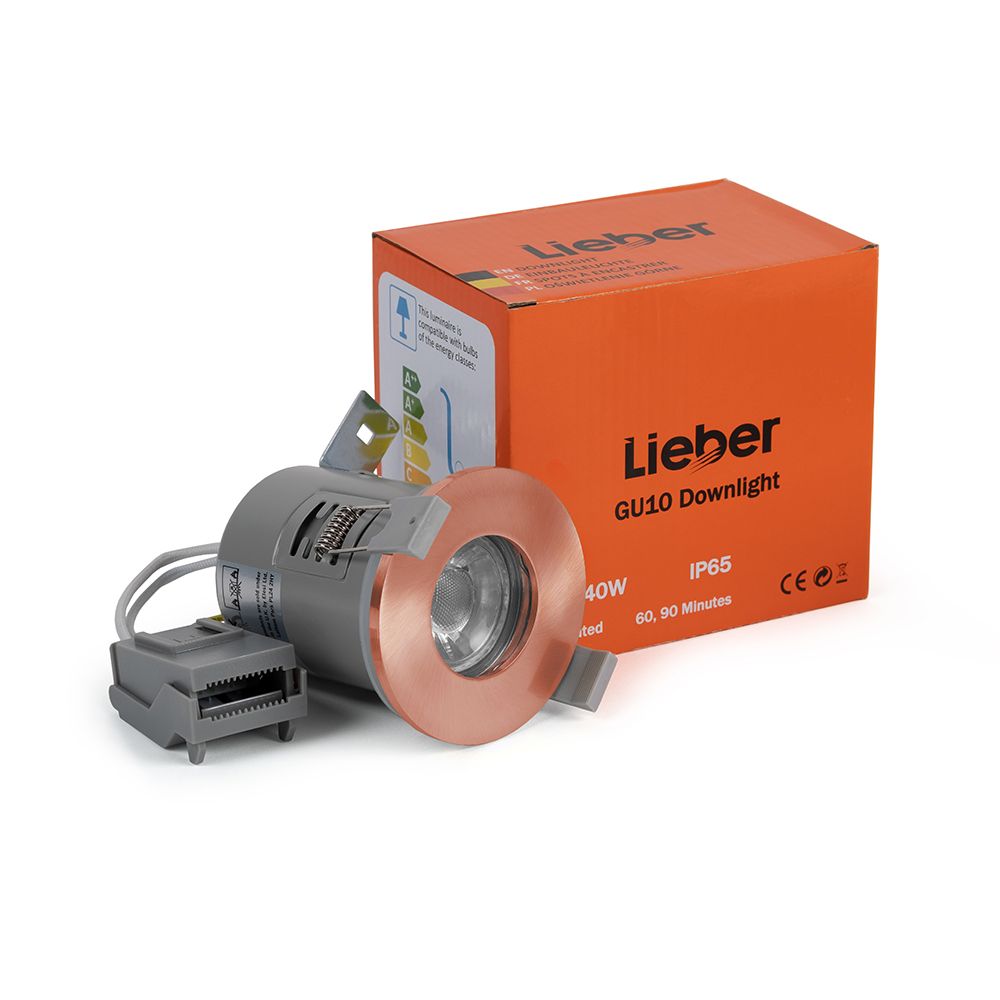
Lieber GU10 downlights are a great lighting choice for a kitchen. Available in a wide range of different metals and in both square and circles. Fire rated to 60 and 90 minutes, and robustly built with 2 connector clips for easy installation.
High CRI Kitchen Lighting
Colour rendering index is a measurement that shows how colours look under a light source, when compared with sunlight. CRI ranges from 0-100 and can have a significant impact on the representation of the room and objects in it.
This is especially important for kitchen task lighting, as you will need to clearly see what you are doing, as well as the colour of the food you are preparing.
Many downlights on the market have a CRI below 90. In 2020 it was estimated that over 90% of domestic downlights available on the UK market provided a CRI of less than 82. In 2021, Soho Lighting launched their range of High CRI LED Downlights.
Ambient Lighting
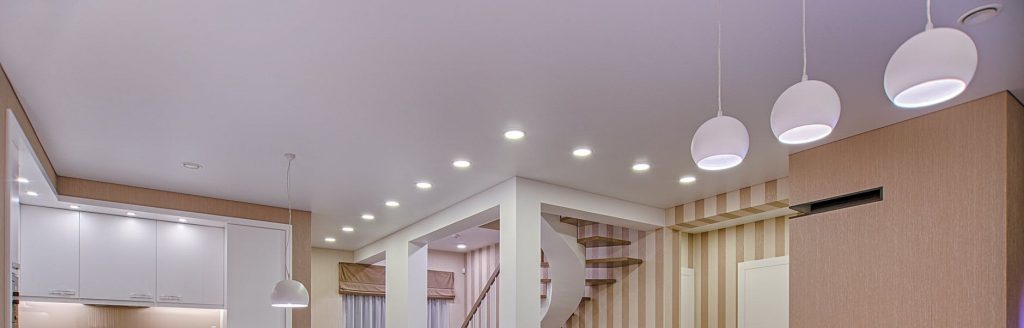
Ambient lighting is the foundation layer of lighting in a room that makes a room usable. If you have a kitchen island, this could be created easily with a row of pendant lights. Appropriately placed downlights will also help to complete your ambient lighting scheme in your kitchen.
Adding a dimmer switch to your ambient lighting is a perfect idea. This allows you to adjust the lighting to meet the mood. Dimming lights is the perfect way to set the mood for a relaxing dinner.
Accent Lighting
Accent lighting is all about reigning in your creativity and having some fun with your kitchen lighting plan. Accent lighting can also help to create ambient lighting, especially through the use of hanging pendant lights or a sconce. Adding pops of different colour to your kitchen with accent is a great addition to a lighting scheme in a contemporary kitchen.
A contemporary technique for adding accent lighting, is using LED strip lights above and underneath cabinets to accentuate their outline.
Accent lighting is designed for that bridge between functionality and style. There is more of a design factor that comes with this lighting style than task and ambient, but still a very important addition to a kitchen.
What Is The Best Colour Temperature For Kitchen Lighting?
Colour temperature is a really important deciding factor when choosing lighting for your kitchen. There are three main colour temperatures to choose from when selecting lighting for a room. These range between a warm white that can be orange in appearance up to the closest match to natural lighting.
In a kitchen, a bright white/cool light colour temperature, around 4100 Kelvin is a desirable choice. Close to daylight, this cool light will give the kitchen a whiter, more energetic feel. Creating a light, airy and social space.
However, colour temperatures do vary depending on the type of kitchen lighting style that you opt for.
Task lighting uses between 4000K to 5000K colour temperature for that natural day light setting. This is the ideal type of lighting when being used to work in.
When creating an ambient lighting setup in your kitchen, a colour temperature between 2800K to 3500K will help to set the mood. Whilst accent lighting uses between 3000K to 4000K for a warm to cool white colour transition.
What Is The Rule of Odds?
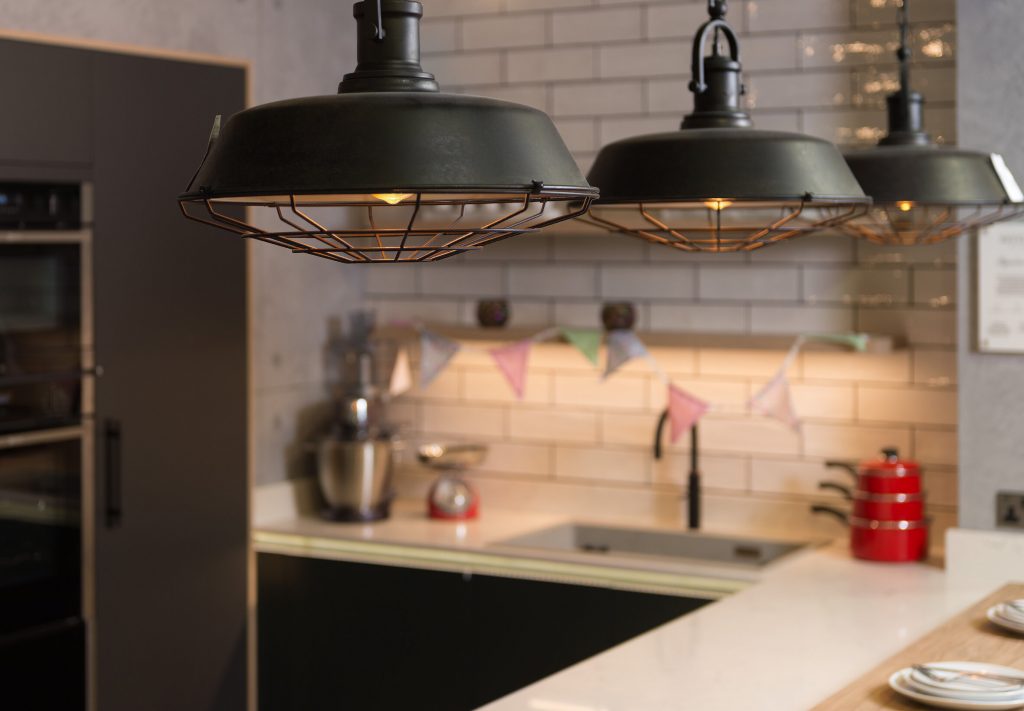
When it comes to lighting a kitchen, it's all about odds. The rule of odds is a design concept which proclaims that positioning an odd number of lights is more attractive than an even amount.
There's more science behind it than just hearsay though. In the example of a breakfast bar, you would normally hang a set of three pendant lights. The placement of three pendant lights creates space and air around the lights. As opposed to two lights which create a boxed in and divided area, closing off the room.
The symmetry a row of 3 or 5 pendants creates allows for a harmonious, and well balanced area between the spaces, rather than subjects.
With a bit of direction, you can select the perfect lighting for your kitchen that will fulfil functionality, style and practicality.
[related_products is_auto_added="1"]A kitchen is the heart of any home. In our kitchen lighting guide, we take a look at why choosing the right kitchen lights is so important.
If you’re currently looking into which sockets and switches you need for your home, you’ll know that there are plenty of different options available. This can make choosing the right ones a bit confusing. When choosing light switches, you’ll no doubt have seen that as well as different amounts of gangs and finishes, there are 1 way, 2 way and intermediates too.
What Are Gangs on Switches?
The number of gangs is fairly simple to understand when it comes to light switches and power socket – this is the number of switches or socket inlets. So a 2 gang light switch has two switches on one plate, and each controls two different lights. If you are struggling to choose the right finish for your switches and sockets, read our blog: Matching Switch and Socket Finishes to Interior Design Styles.
1 Way and 2 Way Switches
1 way, 2 way and intermediate is related to the number of switches used to operate a light. So, if you have a light and a 1 way switch, you can just have that one switch controlling that light. This works well is you have a small room with one entrance or door way, as often one switch is ample.
If you have two entrances to a room or want to control a light from a second position, ie:
- By the bedroom door and next to a bed, or
- By an internal kitchen door and an external back door,
then you will require a 2 way switch. A 2 way switch enables you therefore to have 2 switches controlling the operation of one light.
The cost difference between 1 way and 2 way switches in minimal and a 2 way switch can operate readily as a 1 way switch. As such, for ease, most electricians and architects often only specify or fit 2 way switches. As a result, 1 way switches are not very common.
Intermediate Switch
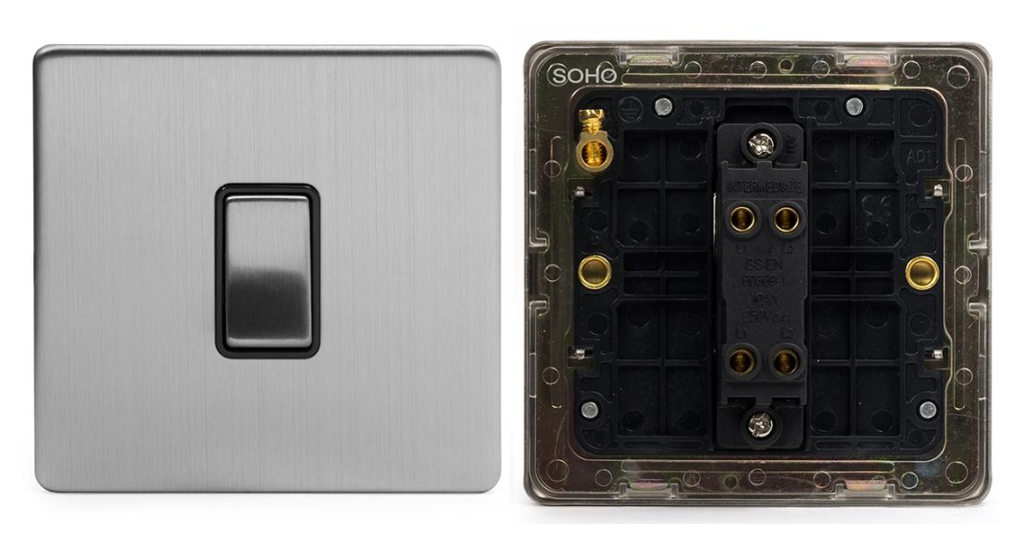
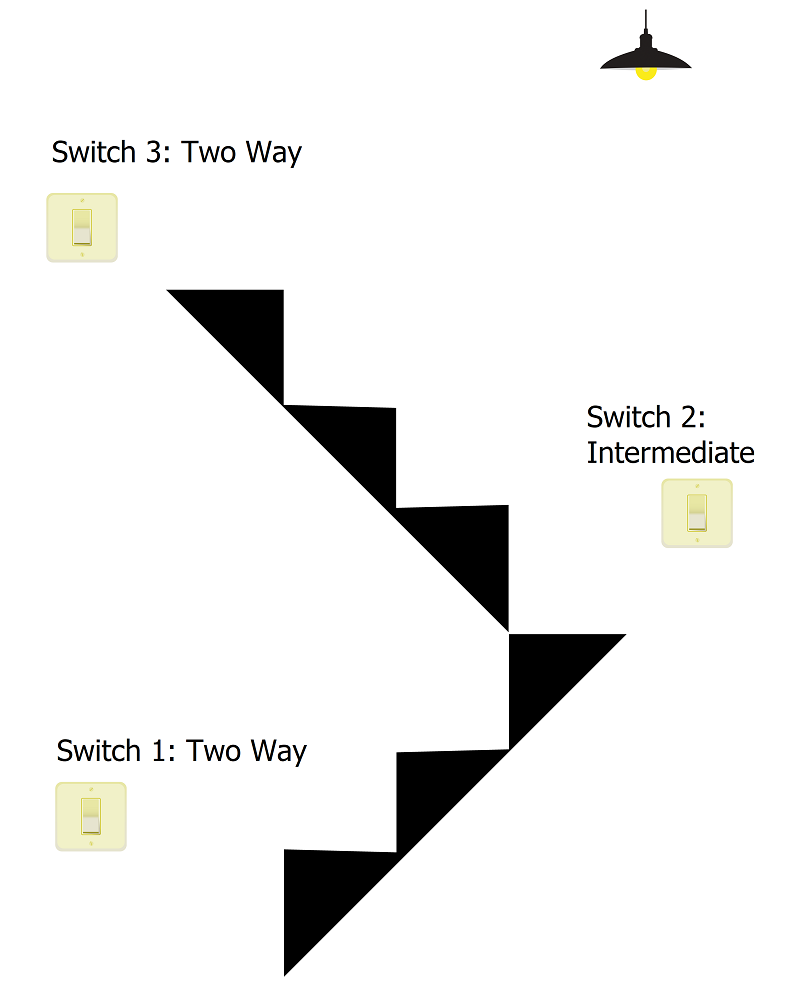
An Intermediate switches (also known as a 3 way switch) is used when you need to operate a light fitting from more than two locations, ie you may went to control a landing or stairwell light from the ground floor, second floor and halfway in between such as a first floor landing.
Why would you use a 1 way light switch?
These switches are slightly less common than 2 way light switches, so most people tend to just use 2 way instead of 1 way, as these often cost the same, or even less than 1 way switches. You would use a 1 way switch if you had a light you wanted to switch on and off using just 1 switch.
Why would you use a 2 way light switch?
These the most common types of light switches, especially in small to mid-sized homes. If you have a light and need to control it with two switches, you can use a 2 way switch. This is commonly used around stairs. For example, if you have a light at the top of your stairs, you may wish to control it with a switch at the bottom of the stairs and at the top of the stairs so you don’t have to walk back down to switch it off at night.
2 way switches work for up to 2 switches operating a light, so are often used in place of 1 way light switches.
Why would you use an intermediate switch?
You would use an intermediate switch when you need to control a light with more than 2 switches. A common example for this is when you have a staircase with a landing in the middle and a switch on the bottom floor, the landing and at the top, all controlling a light on the landing. Again, this is so you don’t need to walk all the way downstairs to switch off a light at night.
Intermediate switches can be used in place of 1 way and 2 way light switches if needed, however they are often more expensive than 2 way switches, so it is more common to only use them when needed.
Intermediate switches, like 1 and 2 way switches can come in the form of rocker or toggle switches. They are sometimes available as dimmer switches, but these are actually intermediate dummy dimmers.
To find out more about intermediate switches read our guide: What is an intermediate switch.
[related_products is_auto_added="1"]If you’re currently looking into which sockets and switches you need for your home, you’ll know that there are plenty of different options available. This can make choosing the right ones a bit confusing. When choosing light switches, you’ll no doubt have seen that as well as different amounts of gangs and finishes, there are […]
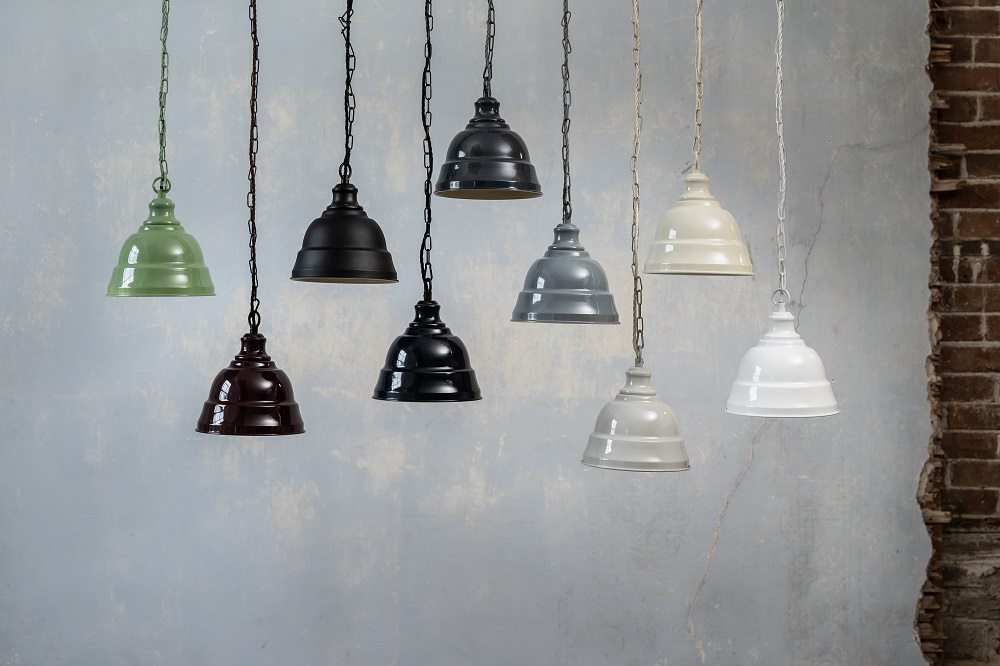
In this guide, we'll take a look at how to choose pendant lights and how they can make or break your interior. Get it right and they can transform a space in your home, adding presence and style. Get it wrong, and they can quickly create an eyesore, detracting from the rest of your room.
There are various key considerations to make when choosing the right style of pendant light for your home. Before delving in, where do pendant lights really come into their own in a home?
Where Can Pendant Lights Be Hung?
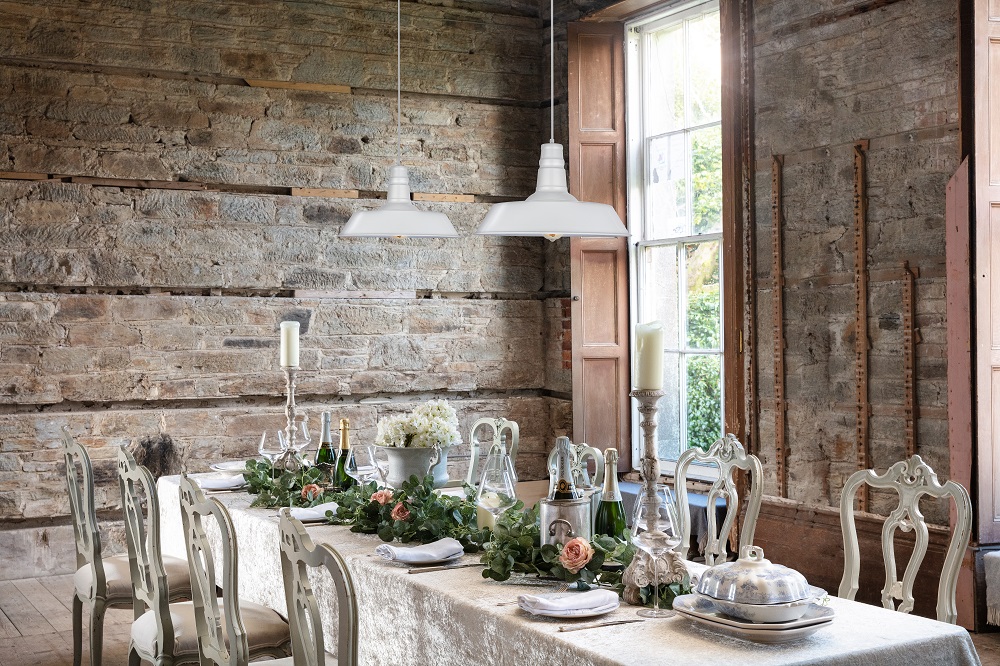
Pendant lights are suspended from a ceiling, anywhere between 30-36 inches above the target surface. Because of their unique positioning, they work really well suspended over breakfast bars to keep the space social, light and airy. They create a dramatic focal point over a dining table and they can add some gravitas to a high ceilinged hallway.
Whilst these are timeless ways to incorporate pendant lighting into your home, pendant lighting can add a unique and gorgeous focal point in areas you may not have considered. Light up a reading nook, position them on either side of a bed in the bedroom or over a coffee table. Whilst pendant lights work perfectly when hung above a target option, you can be creative with their positioning too.
Take a look at our tips below for picking and hanging the right pendant lights in your home.
What Is The Best Height For A Pendant Light?
Height is one of the main deciding factors when choosing and positioning your pendant lights. Too low and the lighting can become obtrusive and block the view, but if it's hung too high you're going to have a view of the bulb and not much else.
Judging the height can be tricky as it all comes down to your interior space and size. Although, as a general rule of thumb, when suspending pendant lights over an object such as a breakfast bar or dining table, the pendant should be between 30-36 inches above the target object.
If the light is being suspended in a hallway for example, then working between 60-66 inches from the floor should help you to achieve the perfect height. Stairwell and high ceilinged rooms will need a long drop (cable), this length can often be reduced by an electrician if required. However, this option is not for everyone. You will need to take into consideration the height of your ceilings, as this will not work with low ceilings!

What Is The Best Size For A Pendant Light?
With colour and style aside, when determining the perfect pendant light for your interior, size and scale is going to play a huge role.
Along with height and shape, the size and scale need to be appropriate to the room to work effectively and harmoniously. Opting for a line of wide-brimmed pendant lights won't work over a breakfast bar in a tiny space, but tapered clear glass pendants would add space, light and style. Everything is relative to the space you have, so do be mindful of this.
Technically speaking, if you want to nail the sizing down to the last inch, there are ways that you can determine the absolute perfect pendant size for your space.
You're going to need a pen, paper and a tape measure for this one! Take the length and width of your room in feet, add those together and that is the perfect size in inches that your pendant light should be. You can follow the same formula when calculating for a line of three pendants over a kitchen bar.
What Shape Should Pendant Lights Be?
When it comes to the shape of the pendant light, there are a few things to think about.
Different shapes of pendant lights suit different rooms, this again can come down to the size of the pendant light. Wide pendants will crowd a small hallway, bigger is not always better. Pendants will become visually obtrusive if not matched to the room correctly.
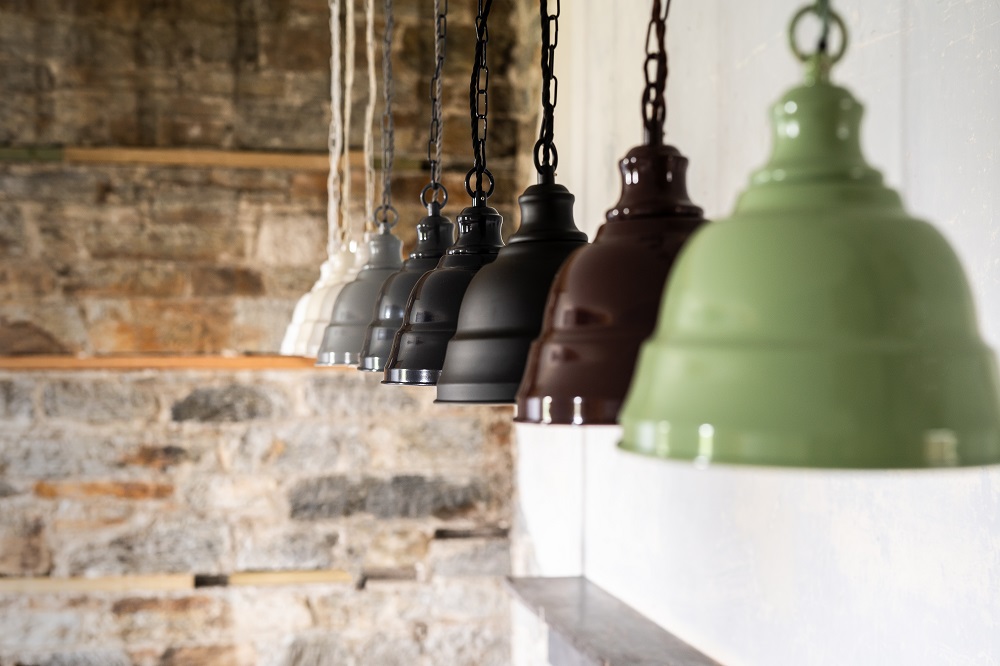
A lot of people choose to opt for the same pendant light as this creates a harmonious lighting plan in their home. However, if you're feeling brave, you can mix shapes with some careful planning.
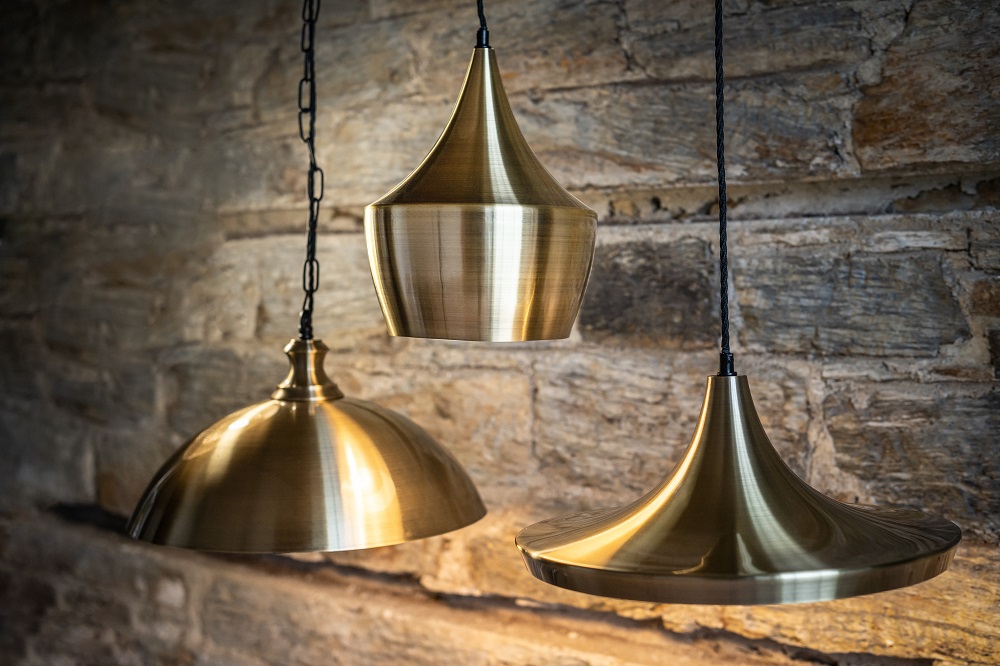
As a general rule of thumb, it's best not to mix smooth shapes with an angled shape. As demonstrated below, here is an instance when mixing shapes wouldn't work.
But you can mix up shapes in a transitional way creating interest, character and scale in the space. When contrasting shapes, try to stick with a similar or matching finish for lighting cohesion. This will make the finished lighting look integrated but modern and fun in style.
What Is The Best Lighting Style?
Now we've nailed down how to identify the perfect pendant shape and size, let's take a look at the different lighting styles to consider.
A beam angle produces a thinner beam which creates a more concentrated light source. If you want task lighting, then a thin, funnel or cone shape pendant would work. Pendants of this vain can still very much be stylish, decorative and functional.
Wider shades give wider light for more ambience, whilst providing a dominant focal point. Outward ambient lighting like this helps to brighten up the entire space. This is a great choice for larger spaces.
If you have an attractive ceiling or a smaller space to light, bulb holders, fully glass pendant lights and chandeliers will allow for upward lighting, creating an airy, social and light space.
We hope you've enjoyed our guide on how to choose pendant lights. As you can see, they are the type of lights that can do everything. They're engaging, functional, can brighten a space, and can add presence to any room they hang in when carefully selected. Take a look at our extensive range of pendant lights for some more inspiration.
[related_products is_auto_added="1"]In our guide on how to choose pendant lights, we look at the key considerations to think about when choosing the right style of pendant light for your home including size, shape and lighting style.

Creating a home office is more than likely something you've had to consider over the last 5 months.
Your home office setup may have got you through the earlier days, but with many companies encouraging workers to continue remote working for the forseeable future, now is the perfect time to take a look at your current setup.
Why You Need To Get Home Office Lighting Right
Having a light and ambient environment is conducive to productivity and efficiency. Poor lighting in an office space where you work all day can cause headaches, low mood and ultimately impair your ability to work effectively. If you're squinting, getting regular headaches and losing concentration quickly, poor lighting could well be a factor.
It has been scientifically proven that a well lit environment can increase your mood, overall wellbeing and productivity.
With this in mind, here are 7 home office lighting ideas to create an ambient and productive working space in no time.
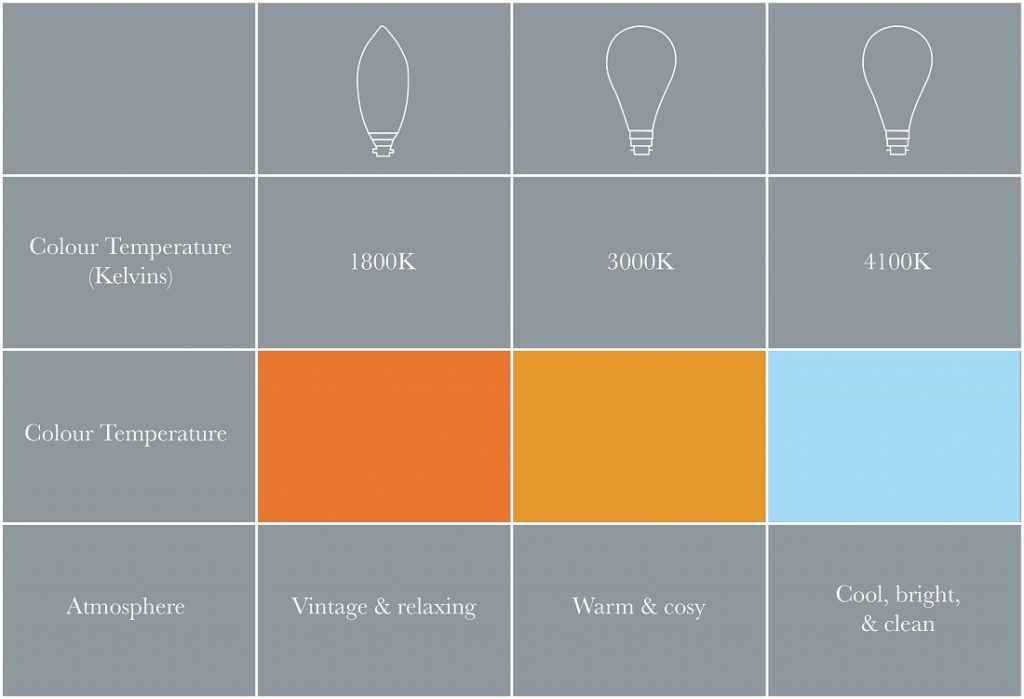
1.Colour Temperature - Light Bulbs
When choosing light bulbs for your lamps or light fittings, colour temperature should be one of your key considerations.
Colour temperature is measured in degrees Kelvin on a scale from 1000 to 10000. When you see the number 3000K or 4100K for example, the K stands for Kelvins. Bulbs with a lower temperature will have a warmer light.
Selecting a colour temperature somewhere between 4000-5000K is the closest colour to perfect daylight. This is perfect for task lighting. Bulbs of these temperatures will help you stay alert during the working day without causing any strain on your eyes. Use the same colour throughout the home office in all of your fixtures for balanced lighting.
Take a look at our range of LED bulbs that are categorised by colour temperature.
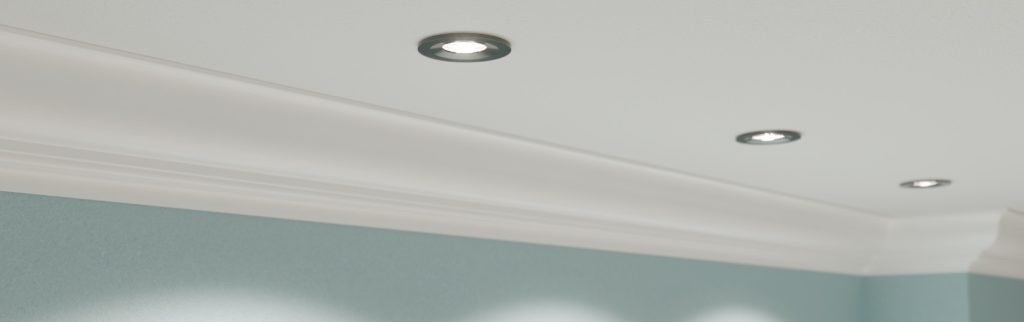
2. Tiltable Downlights
Tiltable downlights are a fantastic lighting choice for office space as they allow you to direct the light specifically onto a surface as required.
Downlights should be spaced out evenly across the room to create well balanced lighting.
Our tiltable / adjustable LED downlights come in a variety of colour temperatures and finishes to suit most styles of decor.
3. Lamps
Creating evenly balanced lighting throughout your room with light fixtures is the best way to ensure that you have an ambient and light working environment at all times. However, there may be times that you require extra lighting directed onto your working surface.
Lamps are a great addition to a space, for decorative style and adding extra lighting where you need it most. Lamps are a god send on those dark and dreary winter days where your lighting just doesn't cut it.
Selecting a lamp that has some kind of adjustable neck or stem will allow you to create adjustable lighting options. Just make sure you choose the colour temperature of your LED bulb carefully to ensure you get the most out of your stylish light fixture.
4. Natural Daylight
If you have access to natural daylight such as a window or a skylight window, try to work your home office layout around this. Positioning your desk sideways to a window is the optimum place to be without dazzling yourself with daylight.
Natural daylight has shown to improve and boost mood whilst aiding productivity. Especially during the summer months where you want to rely on natural daylight as much as possible. It will also help to keep those electricity bills low!
Pictured: 4W E27 Vintage Edison G125 LED Light Bulb 1800K Spiral Filament Dimmable ES
5. Dimmer Switches
Placing light fixtures on dimmer switches, particularly ambient lighting can help you to adjust the lighting throughout the day as required by daylight, mood and work.
Whilst dimmer switches can be slightly more expensive, you may be able to get additional years of use out of your bulbs by using the dimmer on a low light setting. Good for the environment, and those purse strings!
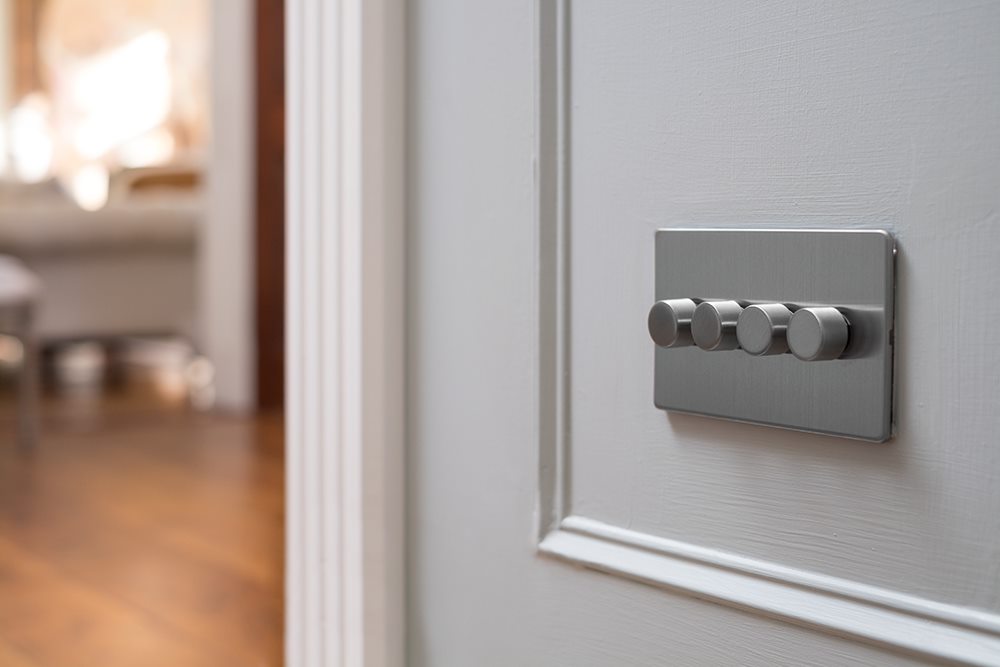
Pictured: Soho Lighting Brushed Chrome 4 Gang 2 Way Trailing Edge LED Dimmer Switch 250W Screwless.
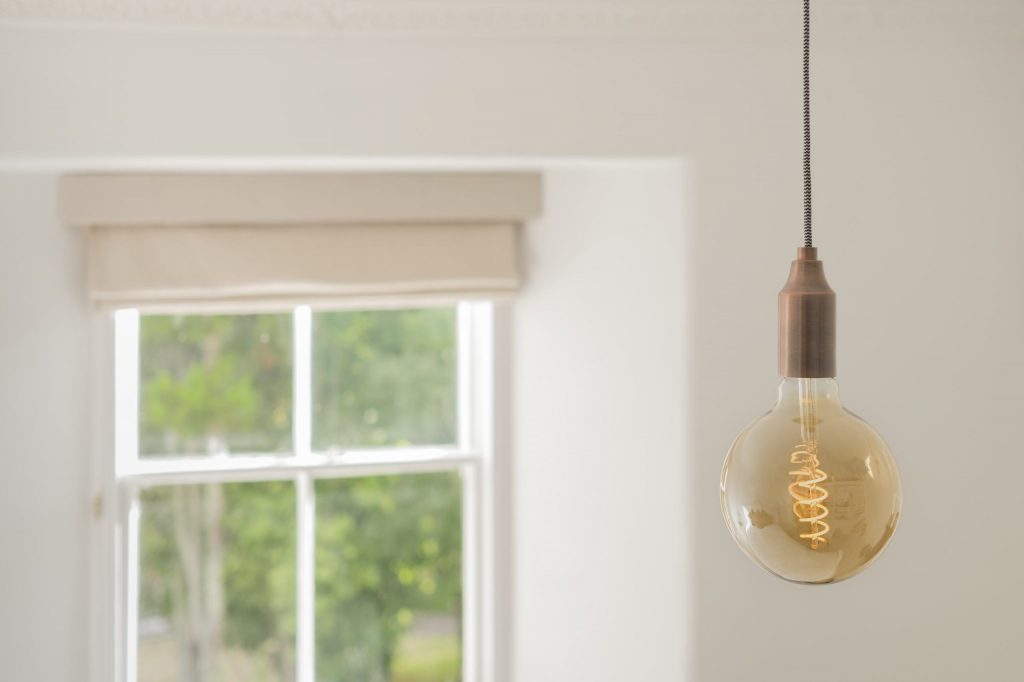
6. Use Lighting To Add Colour
Whilst practicality should ultimately be at the forefront of your mind when choosing lighting for your home office, it's good for it to look aesthetically pleasing too.
You'll be spending the majority of your week here, so it needs to be inviting, warming and make you feel comfortable. Using lighting to add pops of colour to your home office is a great way to comfortably bring in colour that doesn't detract from your desk space during the working day.
Whether you choose to do this through lamps, pendant lighting or wall fixtures, be creative and don't be afraid of colour!
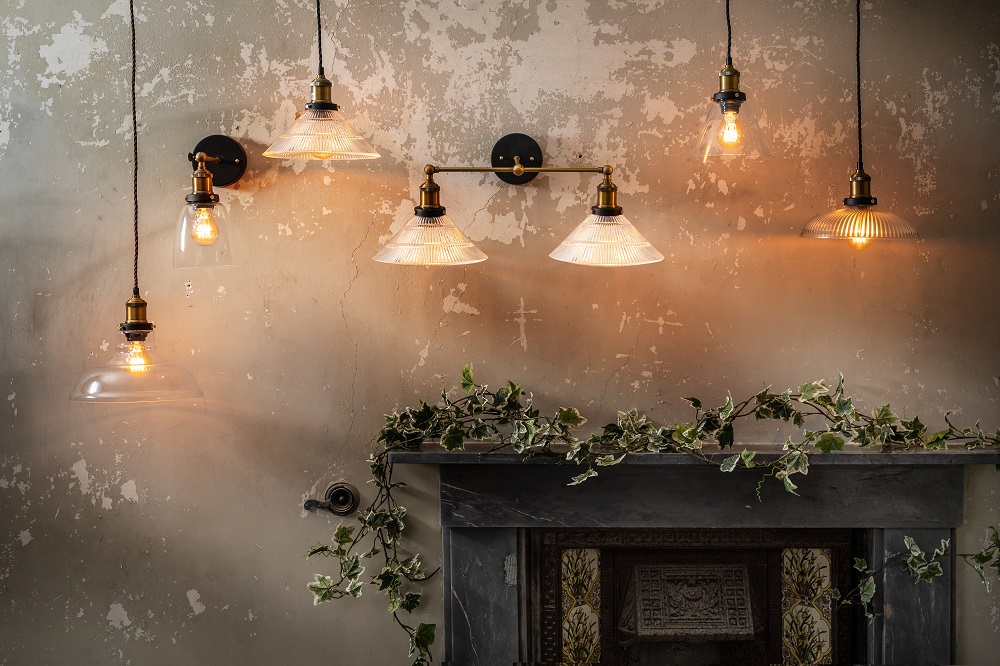
Pictured: Oxford Vintage Pendant Lights
7. Sockets
It could be argued that on average you engage with your sockets and switches more than any other interior feature. Without a doubt, they become the most used feature in any home office to power lighting and charge office equipment.
Choosing the right hardware finishes is just as important as the right lighting, bringing style and practicality to your workspace.
When it comes to sockets, you really want to opt for those that offer the best functionality. Our screwless USB sockets are a great choice for an office space, allowing you to charge further items and by using just the cable if required.
As they say, you are a product of your environment! We hope these 7 home office lighting tips will help you to create a comfortable, practical and productive working environment.
[related_products is_auto_added="1"]7 home office lighting ideas to create an ambient and comfortable working space that will boost productivity and efficiency.
A retractive switch is a switch that returns to its original state after being pressed – unlike a common toggle or rocker switch, which maintains its pressed position.
While they are a common sight in industrial and commercial settings, retractive switches have recently become more prevalent in the home, largely due to the advent of smart home technology. They generally cost more than common 1- or 2-way switches and come in a range of varieties and designs to suit different purposes.
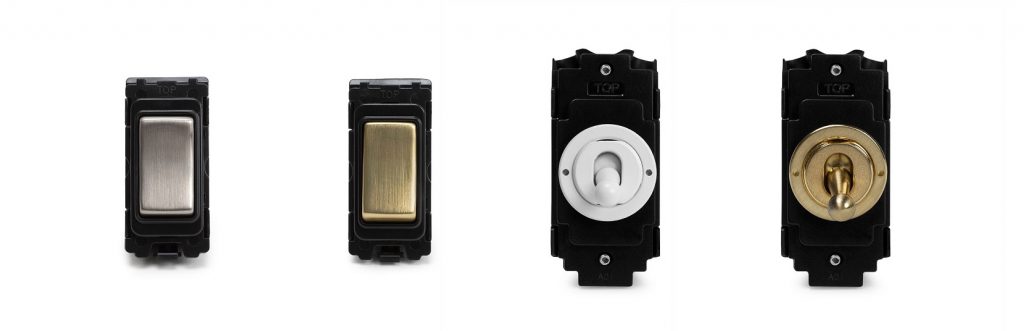
Push Button Retractive Switch
Push button retractive switches can come in a number of styles – from the smaller, more subtle designs used for lighting controls and doorbells, to the larger, industrial-looking buttons employed for door releases and emergency stop buttons.
One-way Retractive Switch
This switch closely resembles a regular one-way rocker switch and has the same up and down ON/OFF positions. However, it contains an internal spring that automatically resets the switch back to OFF upon release.
One-way retractive switches can be used in any situation where only a momentary electrical signal is required, such as internal bell switches and timed door releases.
Two-way & Off Retractive Switch
The two-way and off retractive switch has three positions – two up-and-down ON positions, with an OFF position in the centre. Similar to the one-way retractive switch, it is sprung and automatically resets to the central OFF position.
You can use two-way and off retractive switches to operate anything that requires raising or lowering – for example, an electronic shutter or blind.
Retractive switches in the home
Retractive Switches for Smart Homes
A smart home is an environment that allows appliances and devices in the home to be connected over a digital network and managed through a central hub. You can then monitor and control these devices through an app on a smartphone or tablet, meaning you can turn on the heating before you arrive home or set a timer to heat up the coffee machine before you wake up.
On top of the app controls, a smart home is also typically controlled through internal buttons and switches, and the retractive switch is often the most versatile choice in this environment.
Having a retractive switch that sends a momentary signal, rather than maintaining a switched-on position, is useful in a smart home because that signal can be programmed to trigger a wide variety of functions. The switch could raise and lower a blind or shutter, control lighting, turn up a thermostat, or even control an entertainment system.
Retractive Switches with Dimming Packs
Retractive switches can be fitted with dimming packs for simple light level control, allowing a single switch to both switch a light on and off, and control dimming. A quick push on the switch will turn the light on or off. When the switch is held down, the lights will dim down. When pressed and held again, it will dim up.
Unlike a basic rotary dimmer, a retractive switch with a dimming pack allows you to adjust light levels from multiple locations. For example, if you had rotary dimmers at the top and bottom of the stairs, only one would be able to adjust the light level. However, with a retractive switch you can control the light level using both the upstairs and downstairs switches.
Also, basic rotary dimmers can be prone to flickering, especially when used with LED bulbs. This is not an issue when using a retractive switch.
You can't simply install a retractive switch in place of a regular rocker or toggle switch as they require different wiring setups. Please consult a qualified electrician before attempting installation.
FAQs
A push to make switch is a switch that connects a circuit when pushed. This allows for the flow of electricity between two contacts when held in. The circuit is then broken when the circuit is broken. This technology is commonly used in doorbells or computer case power switches. One way and two way retractive switches can be used as push to make switches. These switches spring back to their original position.
A push to break switch is a switch that breaks a circuit when pressed. This technology is often used to control fridge lights as well as door releases. When the button is not pressed, the electricity can flow. Two way retractive switches can be used as push to break switches. These switches spring back to their original position.
We look at retractive switches, what they are used for and how they differ from other types of common light switches.
One of our most popular finishes, antique brass, also known as aged brass has a beautifully warm look that tends to suit period properties, but can also add a classic twist to a modern décor. Often used on features such as door handles and mirror frames, it can really add to a room when used on lighting, sockets and switches.
Antique brass can be aged using either raw brass or brass plating (which is when plating is put over another metal). The finish is created treating the brass so it appears aged. Typically it has a rich brown tone, with a slightly golden undertone. The aged finish tends not to shine as much as polished brass and tends to hide polishes and blemishes so much better. Compared to brushed brass or satin brass, antique brass has less of a golden appearance.

Browse our antique brass sockets & switches
Which colours go well with antique brass
This is a period style finish, so bright, neon colours will look out of place. Go for simple blacks and whites, or dark, deep colours. Aged brass can look great against classic white tiles, for example in a kitchen or bathroom.
For a luxurious appearance, pair antique brass sockets and switches with rich materials such as marble, leather and suede, however be sure to create a space that looks cosy too, with soft textures and rugs to avoid a look that appears too luxurious for relaxation.
The beauty of antique brass sockets and switches is that scatterings of brass can give your room a subtle elegance. This, along with brass cupboard handles in a kitchen can sprinkle the colour throughout your home without being overbearing.
Don’t go cheap
One important thing to consider when looking to add antique brass to your home is that this is a luxurious finish in appearance, so cheap looking lighting or sockets and switches in a poor antique brass finish can look terrible.
No matter whether you choose antique brass taps, mirror frames, door handles, sockets & switches or lighting, it is best to go for robust, well made products rather than poorly manufactured products, in order to for you to get the most out of this beautiful finish.
[related_products is_auto_added="1"]One of our most popular finishes, antique brass, also known as aged brass has a beautifully warm look that tends to suit period properties, but can also add a classic twist to a modern décor. Often used on features such as door handles and mirror frames, it can really add to a room when used […]
Downlight Buying Guide
Here at Elesi, we stock various types of downlights from a number of different brands. We are often asked what are the best LED downlights? This is a difficult question to answer, as it really depends on the location, what is needed, the style of the room, and the budget.
Generally, much like any other product type you get what you pay for when it comes to downlights. Many cheaper downlights don’t have the features that the more expensive ones have. So, in terms of features and benefits, the best downlights are those that cost more. However, if you don’t require those features, then the best option may be cheaper.
Which downlight features do I need?
Look out for features such as fire rated (and for how long they have been tested); IP44 or IP65 rated; LED; Colour temperature switch, and the ability to dim. Here is a quick overview of some of the more common features.
Fire Rated Downlights
If you are putting downlights in a room that has a floor above it, you will need fire-rated downlights. This is not only a building regulations requirement; it is essential for the safe keeping of the occupants above you.
What are fire rated downlights?
Fire-rated downlights have been tested and proven to impede the spread of fire upwards, thus offering protection to the upper levels of the property. As downlights are often installed by cutting a hole in the ceiling, the structure (fire barrier) is compromised. Therefore, the hole needs to be filled with a downlight that is fire rated to maintain a level of protection against fire.
Fire-rated downlights are tested in different ceiling structures with different thicknesses of plasterboard and spans of joist. This is to ensure they inhibit the spread of fire for a given period of time, enabling occupants to evacuate. Furthermore, fire-rated downlights are rated to 30, 60, and 90 minutes and the rating matches the structure it was tested in.
Whilst it may seem obvious to conclude that a 90-minute fire-rated downlight offers the best protection, these lights were tested in the most solid structures with double thicknesses of plasterboard. Indeed, 30-minute fire rated downlights have been tested in the most challenging structures with wide joists and a single layer of plasterboard.
If in doubt, look for downlights which have passed all 3 ratings of 30, 60, and 90 minutes.
Fire-rated downlights, particularly those that have passed all three ratings are more expensive. This is because they are often better made, include intumescent properties, and have undergone expensive rigorous trials and tests.
Recommended Blog: What are fire-rated downlights?
IP Rated Downlights
The IP rating of downlights relates to their ability to function in areas where they may be subject to intrusion. This could relate to dust, or more commonly in the home, water or moisture. If you use non-IP rated downlights in the bathroom, they’re likely to stop working fairly quickly and can be unsafe.
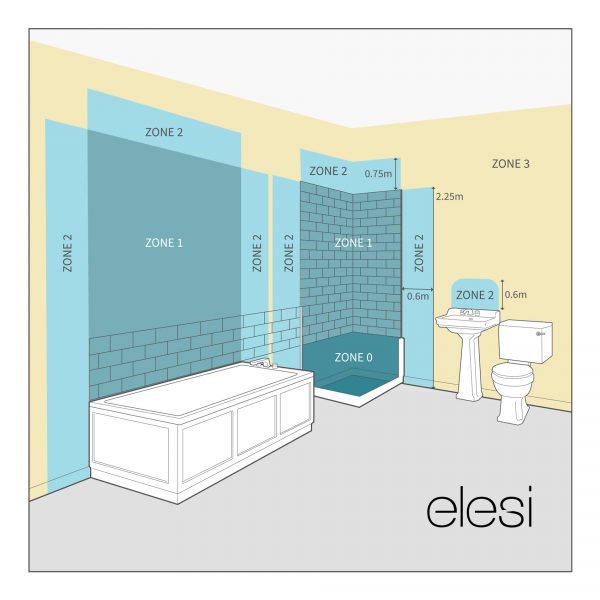
Bathrooms are split into different zones when it comes to IP ratings. Zone 0 is inside the bath or the shower itself. Any fitting here must be low voltage (max 12v) and be rated at least IP67 (100% protected against solid objects like dust and sand. It will have also been tested to work for at least 30 minutes while under 15cm to 1m of water).
Zone 1 is the area above the shower or bath, to a height of 2.25m from the floor. Here the minimum rating required is IP65. Zone 2 is the area stretching 0.6m outside of the perimeter of the bath and to a height of 2.25m from the floor. An IP rating of at least IP44 is required here. It is also good to consider the area around a sink. Any area within 60cm of a tap is also considered zone 2.
Outside zones are anywhere outside zones 0,1 and 2 and where no water jet is likely to be used. There are no specific IP requirements for this zone, however, it is recommended that you consider a light with an IP rating of at least 20. In addition, if you are likely to use water jets for cleaning, you should use a fitting with a minimum of IP65.
You will pay more for IP rated downlights, but they will generally be of better construction and quality.
Recommended Blog: What Are IP Rated Downlights?
LED Downlights
Many downlights do not come with bulbs included. These are commonly GU10 fitting downlights, so the bulbs could be LED if you choose, but they could also be incandescent. There are many benefits of choosing LED bulbs to go in your downlights, including energy efficiency and longevity.
It is now common to purchase LED downlights that do not have replaceable bulbs. This is because LED has such a long lifespan, that you won’t need to change the bulbs often at all. Therefore, the downlights can be built to be robust. These days, with the price of LED dropping, whether you choose LED downlights, or choose downlights that require bulbs to be added in, LED really is the best option around.
You will pay more for longer guarantees but the products are constructed to a higher standard. Look for options with long guarantees to build confidence in the downlight.
Colour Temperature of Downlight
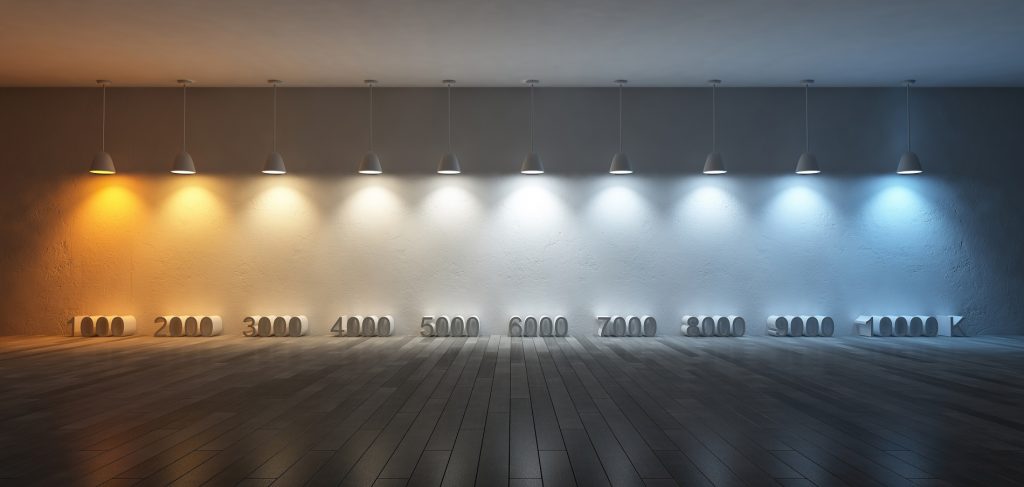
The colour temperature of a bulb describes the appearance of its light. White is the common colour of light that most bulbs emit, but that white light can range from warm (a more orangey colour) to cool (a bluey white colour).
When choosing your downlights, it is worth considering what colour temperature you would like in that location. Certain situations require a cooler, clearer light, however, this doesn’t create a particularly relaxing atmosphere.
One neat option is a CCT switch. This is a switch that lets you flick between different colour temperatures, so you can change the light, depending on the location.
Downlights with a CCT colour temperature changing switch tend to cost more, however, you will be able to adjust the colour temperature to suit your room, quickly and easily.
Recommended Blog: What is colour temperature?
Dim to Warm Downlights
With colour temperature in mind, dim to warm downlights offer a whole new aspect to your lighting design, being especially effective in work areas such as kitchens.
With the ability to change the colour temperature of the lighting from cool to warm white, these dim to warm downlights can be controlled via a dimmer knob. This means that you can easily change the function or ambience of your room with ease. You can shop our range of Dim to Warm Downlights here.
CRI of Downlights
Have you ever wondered why colours can look different in different lights? Maybe you bought a sofa in a showroom, but it looked slightly different at home. Or maybe you changed the light bulbs in your room and the walls look a slightly different colour as a result.
This is due to the Colour Rendering Index (CRI) of the lighting. The Colour Rendering Index, also known as CRI is the measurement of how colours look under a light source when compared with sunlight. A CRI of 100 perfectly matches sunlight.
Recommended Blog: What is the Colour Rendering Index?

The UK lighting supply market is dominated by low CRI LED downlight products. In 2020 it was estimated that over 90% of domestic downlights available on the UK market provided a CRI of less than 82. If choosing LED downlights, be sure to look for high CRI downlights- at least 95. Read more about High CRI downlights here.
Browse our selection of High CRI downlights
Dimmable Downlights
If you are choosing LED downlights, one thing you need to be mindful of is that not all LEDs are dimmable, and not all dimmers work with LED. Dimmable downlights offer the benefit of changing the room for ambience, when moving from task lighting. This can create a more intimate and relaxing feeling.
If you wish to dim your LED downlights, you’re going to need to buy dimmable LED downlights, and you’ll need to use a trailing edge dimmer. Dimmable LEDs can be more expensive than non-dimmable LEDs, and trailing edge dimmers are more expensive than leading edge. Consequently, if you wish to take advantage of the benefits of LED, and require a dimmable light, you will need to spend a little more.
Smart Downlights
Smart technology is fast becoming a part of everyday life in the home, and smart downlights are now a reality. These downlights contain the technology to be able to control almost any aspect of your lighting from brightness to colour temperature, RGB lighting, schedule timers, and even room specific ambience.
All of this is available through an app, or through compatible hubs such as Google Home or Amazon Alexa, which means you can control these lights with your voice. Take a look at our Smart Downlight finishes here.
Downlight Style and Appearance
Not all downlights come with different finishes. If you have a kitchen with antique brass sockets and switches, and you add white downlights, it could ruin the overall look. Therefore, it is worth matching the downlight finish to the overall décor style of the room.
Serviceable Vs Non-Serviceable Downlights
Over time, it’s likely that your downlight parts may need replacing. There are some downlights that are serviceable, and others that aren’t.
If you are using GU10 downlights, you can replace the bulb after its useful live. If the bulb breaks, you don’t need to worry as you can just replace them. You can also switch to different colour temperatures, or to dimmable from non-dimmable if needed.
Alternatively, sealed / non-serviceable downlights often have better construction and better heat dissipation than you can get with a bulb, so they tend to last longer. Choosing an integrated LED downlight with a bigger separate driver gives more room for components and better heat protection (as the driver is positioned away from the head of the light source).
The driver on GU10 bulbs is on the bulb itself, and as the bulb unit is very small, it gets hot, which degrades the light and circuitry.
Whilst sealed units (integrated LED downlights) originally received a bad reputation, as in the early days of LED the failure rate was high, resulting in a need to change and replace units often, these are now far more reliable and often perform much better for far longer than other downlights. They tend to have 40,000-50,000 hours- a 7-10 years of average use.
The driver tends to break first on integrated LED downlights, and better models come with a separate driver, which can easily be replaced.
Choosing the best LED downlights for you
If all of the above factors are important to you, then you may need to spend a little more, however, if you don’t require Fire Rated, IP rated downlights, or you don’t want LED downlights, then you may be able to find downlights without those features, that fit your budget.
The first step for choosing your downlights is deciding which of the above features you require. If you are placing them in a bathroom, then the correct IP rating is essential, as is fire rating if placing downlights in a room with a floor above it. Once you know what you need, and any extra features you want, then you can choose the best downlights for your project.
[related_products is_auto_added="1"]We are often asked what are the best LED downlights? This really depends on the location, what is needed, the style of the room and the budget.
This beautiful, soft tone is perfect for lighting. Rose gold has had a revival in recent years and has become one of the most popular colours for many household items including kettles, pans, electrical appliances and more.

Rose gold looks similar to copper, but has a slightly more mellow appearance, this is due to the content of the metal. Rose gold is an alloy, meaning it is a mixture of other metals, whereas copper is a native metal- a metal that is found in its metallic form in nature. The exact composition values tend to vary, but it is made up of copper, yellow gold and silver. Read more about the differences between rose gold and copper.
The golden-pinkish colour of rose gold tends to work well with soft colours, so rose gold lighting can really complement these sorts of tones. For a modern look, this can work well with black furniture, and can suit both contemporary and a more classic décor style in the kitchen.
There are many options for kitchen lighting, as there are many different uses for the room. Rather than being simply a space for food preparation, it has become more of a social place. You may need task lighting in the form of under-cabinet LED strips, to make it easier to see what you are doing on the worktops; or you may need a more mellow light above the dining area. It’s important however that you have multiple light sources, to reduce shadows. Here are some of our rose gold kitchen lighting ideas.
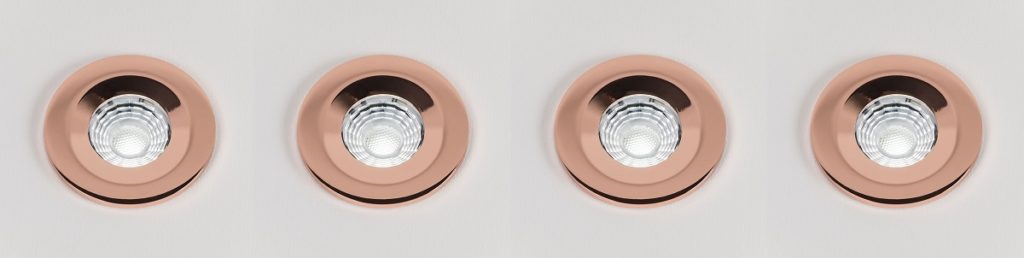
Rose Gold Downlights
This is a simple way of subtly injecting rose gold into the kitchen space. Downlights tend not to be overpowering in appearance as they don’t take a lot of space. They also give you the option of having multiple light sources easily and are perfect for lower ceilings.
You may want to mix it up a little bit by having downlights and pendant lights in different parts of the kitchen. Downlights can also work well for task lighting in the right environment.
Nautical Pendant Lights
This beautifully designed ship style pendant light from Soho Lighting has a stunning rose gold finish that gives off a lovely tone when light reflects off its outer layer. Perfect for a nautical themed kitchen or a more classic / traditional style décor, this pendant is large in size at H 335mm X W 350mm X D 350mm.
Rose Gold Pendants Above a Breakfast Bar
For a lovely, relaxed feel in kitchens with slightly higher ceilings, a row of beautiful rose gold pendant lights is perfect. A wonderful centrepiece, the mellow colour instantly creates a laid back style. Try either a rose gold step pendant light or a rose gold dome pendant to add style and beauty to your kitchen.
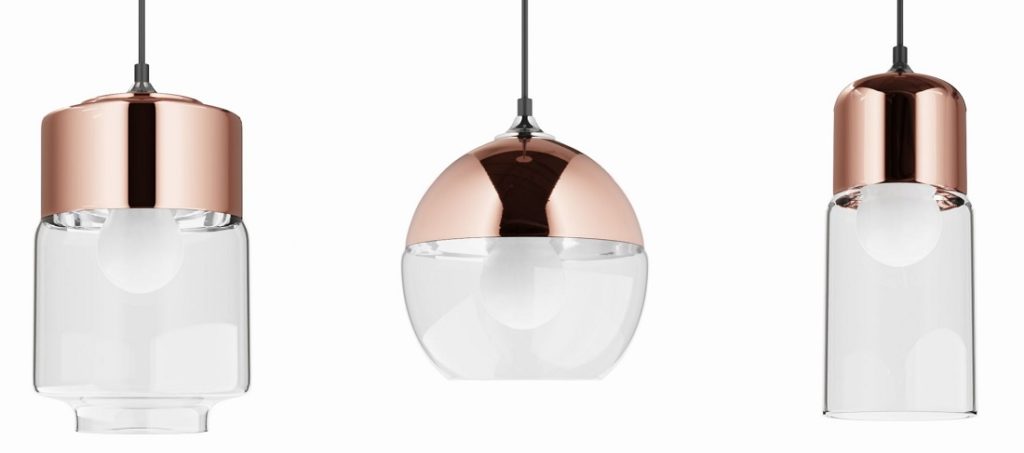
Glass and Rose Gold
These Cambridge glass and rose gold pendant lights work well both on their own or in a row or cluster. Try them over a kitchen island or a kitchen-diner table with a warmer colour temperature bulb (under 3000k) to provide ambience.
[related_products is_auto_added="1"]This beautiful, soft tone is perfect for lighting. Rose gold has had a revival in recent years and has become one of the most popular colours for many household items including kettles, pans, electrical appliances and more. Rose gold looks similar to copper, but has a slightly more mellow appearance, this is due to the […]