Updated April 2022.
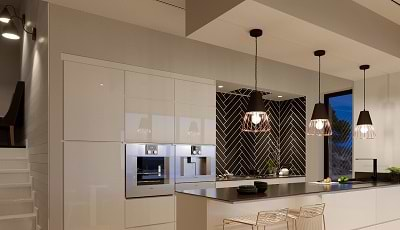
In recent years, LED lights have gone from being available only as unsightly and partly covered in plastic, to being available in traditional or vintage styles. But LED also offers a number of benefits. Some you many know about and others you may not. In this article we look at some of the top benefits of LED lights.
One of the factors that can put people off buying LED bulbs is the price. They tend to be slightly more expensive than incandescent bulbs. However if you take into account the long life of LEDs, over time LED bulbs can become cheaper than traditional incandescents.
LED bulbs don't burnout in the same way that other bulbs do. The filament in incandescent bulbs weakens over time, causing it to burn out; whereas the amount of light produced by LEDs gradually decreases in what is known as lumen depreciation. The lifetime of an LED is based on how long it takes for the output to decrease to 30%. So whilst the illumination will decrease overtime, the lifetime is much longer. LEDs tend to have lifetime of 35,000-50,000 hours, compared to incandescents which have 750-2,000 hours.
They can turn around 70% of their energy into light as they have a high lumen output per light. This makes them far more efficient than other bulbs, which give off heat. A 6 watt LED bulb can produce the same amount of light thata 40 watt incandescent bulb produces. Incandescent bulbs can get very hot but LED bulbs tend to be cooler.
As mentioned earlier, LEDs can often cost more money to purchase compared to incandescent bulbs, however they also cost a lot less to run, due to their energy efficiency. Therefore, in the long run, they offer savings. So if you take into account the lower energy costs, as well as the fact that you will not need to replace them so often, the savings can really add up.
As energy bills continue to rise in recent months, this benefit is more important than ever.
Whilst clean energy has a positive impact on carbon footprints, the energy efficiency of LEDs and other efficient electrical appliances has even more of a positive impact. Essentially, using clean energy is good, but not as good as using less energy. Therefore, an added benefit of the energy efficiency of LEDs is that they have less of an environmental impact.
The long life of LEDs also means that we purchase fewer over our lifetimes, which saves on material production and waste. Many office strip lights contain mercury as well as other chemicals according to an article on the environmental benefits of LED by SEPCO-Solar Lighting. These chemicals can have a negative effect on the environment.
If you are looking to make the switch to LED bulbs, but aren't sure which ones you need, start by reading our LED bulb buying guide. You can also browse through our selection of LED bulbs, and contact us if you have any questions.
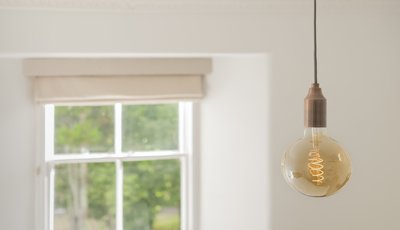
Whilst in previous years, the drawback of LED bulbs has been that they haven't been available in many different styles (we often had to settle for unsightly plastic bulbs) more and more unique styles are becoming available all the time, including colour changing, vintage, smoked, various shapes and styles.
[related_products is_auto_added="1"]Updated April 2022. In recent years, LED lights have gone from being available only as unsightly and partly covered in plastic, to being available in traditional or vintage styles. But LED also offers a number of benefits. Some you many know about and others you may not. In this article we look at some of […]
If you've recently switched to LED light bulbs, or you have used them for a while but now want to use a dimmer switch with them, you may encounter some problems if you don't use the correct dimmer and LED bulbs. Using the incorrect bulbs or switches could lead you to experiencing flickering and buzzing, or no dim at all.
If you've experienced that problem, it is likely to be down to one of two things: the LED lighting you have chosen or the dimmer switch.
Traditional incandescent light bulbs can generally dim without issue, so don't need to be specifically dimmable, however not all LED bulbs are dimmable, and this is due to the way that LED bulbs and incandescent bulbs dim. Analogue dimming, with incandescent bulbs involves controlling the current to dim or brighten the light, whereas LED lights use Pulse Width Modulation (PWM) which involves the light going through a cycle of being on and off, so fast that you won’t be aware of it. So for a bulb to be 20% dimmer, it would need to be off 20% of the time.
Therefore, when planning the lighting in your home or business, if you wish to use a dimmer, you'll need to use dimmable LEDs, be they bulbs or downlights.
See our range of dimmable LED bulbs.
Some LED bulbs can work with the older leading edge dimmer switches, however it's more likely that they'll work with a more modern, trailing edge dimmer switch. (Need more information on these types of dimmers? Visit our blog Trailing Edge vs Leading Edge).These can be a little more expensive than older dimmers, but are more likely to stop issues including buzzing, humming, inability to achieve full brightness or premature bulb burnout.
Better yet, choosing one of our dimmers means you can choose. All of our dimmers contain Enkin dimmers, and the PDM150 allows you to choose between Trailing Edge and Leading edge at the touch of a button. And with soft-start, flicker-free technology, our dimmers will also prolong the life of your LED bulbs.
See our full range of LED dimmer switches.
Yes, we carry Dimming Toggle Switches that best suit traditional or period homes. These are a great alternative to the more modern style dimming knobs.
If you’ve recently switched to LED light bulbs, or you have used them for a while but now want to use a dimmer switch with them, you may encounter some problems if you don’t use the correct dimmer and LED bulbs. Using the incorrect bulbs or switches could lead you to experiencing flickering and buzzing, […]
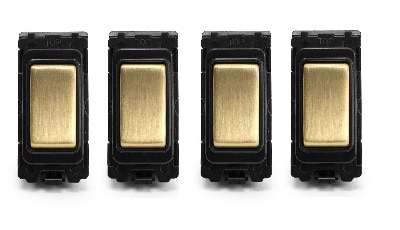
Brass has been a popular finish for sockets, switches, lighting, handles and other features around the home. With a timeless appearance, brass can complement multiple styles of decor, although it perhaps looks most at home in a traditional or classic interior. There are, however multiple types of brass finish including brushed brass, antique brass, burnished brass and polished brass.
In this article we look at the differences between polished brass and antique brass and which sort of styles of design suit each.
Polished brass sockets and switches have a brash finish that has been polished and therefore have a mirror-like reflective surface, whilst still carrying the almost golden brass colour. This finish tends to be bright and shiny as well as very reflective. They gleam more and perhaps appear more eye catching than brushed brass (which has a more satin finished). But the downside is that they can show fingerprints or blemishes a lot more than other brass finishes.
Polished brass is a lot more bright and flashy than antique, brushed and satin brass. But it can look slightly less warm, though it is timeless and has been popular for a long time. It is best suited to traditional rooms, but has a neutral style that works well in more modern homes too.
Antique brass or aged brass is more of a statement finish than polished brass. This beautiful finish is treated to appear aged and typically has a rich brown town with slightly golden undertones. With a warm finish, it doesn't shine or reflect anywhere near as much as polished brass. Therefore hides watermarks and blemishes so much better.
This finish is well suited to vintage, historical, or classic style rooms, however it looks great as a classic twist in a more modern decor. Cheaper sockets and switches can let down antique brass, as it really needs to look robust and strong in order to look the part, so be sure to go for higher quality antique brass sockets and switches.
This finish may not be quite as universal as polished brass, but when the style of decor calls for something more classic and eye-catching, antique brass is likely to fit the role.
When comparing these two finishes, it is very much down to personal preference.
Lacquered brass has a finish or surface coating that prevents the brass from ageing or tarnishing over time. This is a huge benefit because the finish can be enjoyed throughout the lifetime of its use. It will always retain its beautiful, rich colouring and will not fade or distort through weather or time. If you're looking for a low maintenance light or socket and switches, then this is a favourable option.
Whereas unlaquered brass does not have a surface coating for protection so it can age and tarnish overtime, however, its original finish can easily be restored by polishing it.
The finish of antique brass appears aged and has a typically rich brown tone with golden undertones. This executive finish is not flashy. The subtleness of the finish makes it well suited to the decor of most homes, but is mostly suited to vintage and period style properties.
Burnished brass combines the aesthetics of bright polished brass with antique and weathered brass. Indeed, it's a finish that has the best of both worlds. Combining the gorgeous bright gold tones from polished brass and blending with the brown tones from antique or aged brass. Unlike polished brass, the golden colour is not shiny, it could continue to patina depending on the burnishing technique that is used.
Take a look at our full range of sockets and switches to find your perfect finish.[related_products is_auto_added="1"]
In this article we look at the differences between polished brass and antique brass and which sort of styles of design suit each of them the most.
A soft mixture of green and blue, turquoise can add a certain serenity to any room. It can be used subtly, or throughout the décor and adds a nautical style due to its association with the sea or calm lakes on a sunny day.
Turquoise can be a welcome addition to any room, as it isn’t overly stimulating for a bedroom, isn’t overbearing for a living room and can suit the nature of the bathroom. You don’t need to go all out and colour everything in turquoise though, there are many ways to add a splash of the blue green colour to your room. In this article we look at five turquoise décor ideas.
This is a really simple way to inject a bit of turquoise into the room. Simply put up some pictures on your wall. Photos of the sea can work really well for this, or paintings that mix blues and greens. This can subtly affect the overall feel of the room without taking a lot of effort.
Decorative lighting is a great way to bring in some colour. The OhSo F&B range from Soho Lighting includes a selection of beautiful hand made duck egg blue / turquoise pendant lights and wall lights. These stunning lights come in variety of designs to suit various sizes and shapes of room. The larger lights make a real statement and can be enough alone to add turquoise to the space, and the smaller lights work well in clusters to have a similar effect.
If you wish to add a bit of turquoise to the lower part of your room, without changing everything, a rug can be a far easier solution than changing the carpet or painting the floorboards. If you later decide that the colour isn’t for you, it is far easier to remove a rug too!
If wall art, lighting and rugs don’t quite add enough turquoise to your room, try painting one or more of the walls. This can create a tranquil feel and can work well with greys and whites.
Try adding turquoise tables, sofas or chairs to your room. This may look a bit over the top if you have painted the walls in the same colour, but if you add turquoise furniture to a room that has been painted white or grey, it can make it look eye catching.[related_products is_auto_added="1"]
Turquoise can be a welcome addition to any room. In this article we look at five turquoise décor ideas.
Despite not taking up a huge amount of space, sockets and switches can be seen throughout any property, so often play a big part in the appearance, as well as being vital to the functionality. Often overlooked as an afterthought, choosing which sockets and switches to purchase is actually a big decision.
In this article, we look at five considerations to take into account when choosing the right sockets and switches for your property.
If you have a vintage style property with high ceilings, expensive pieces or art on the walls and antique furniture, the whole appearance of the room will be ruined if you fit cheap white plastic sockets and switches. And if you have a contemporary style room, antique style electrical fittings could equally look out of place.
Think about the style of décor you have, before thinking about the finish. Some common finishes like brushed chrome and polished chrome can fit in well with both contemporary or traditional styles. Black nickel tends to suit modern rooms, especially if you have black furniture or electronics.
Antique brass and antique bronze fittings suit period properties, as does brushed and polished brass, although polished is fairly versatile in the way it can fit in modern new builds too. Many modern new builds with a neutral décor tend to be fitted with chrome or white fittings, which don’t tend to make such a statement as fittings such as brass and black nickel, but are far more neutral.
Industrial style rooms tend to suit antique brass or even copper fittings, but this depends a lot on the sort of colours and finishes used elsewhere in the room.
When choosing a style for your sockets and switches, also consider whether certain trends are likely to pass. There are some types of switch that are currently popular, but may look dated in year. Generally, if you want a regular switch style, you can't go wrong with the timeless rocker, dimmer or regular toggle. These have been popular for a long time, and still show no signs of looking old.
The type of plate you choose can have a subtle impact on the overall look of the room. Screwed plates tend to look a little cheaper, however they may fit in well with an ultra urban / industrial style of décor. Screwless finishes tend to look more classy though.
Flat plates tend to look more slick than raised plates, however it’s not always possible to install them, and they do often cost more than raised plates.
This is where you have to take into account both appearance and functionality. There are plenty of options on the market, with even more becoming available every so often. Some of the common options include toggle, rocker, dimmer and touch switches.
Dimmer switches are great for versatility, but not always needed. These do often cost more than rocker switches, so you may choose to use them only where you really need to adapt the lighting levels to the situation.
Toggle switches are perfect for period properties and really elevate the style of the room to the next level, giving it a feeling of class. Again they tend to cost more than rocker switches, and may not suit more contemporary designs.
Rocker switches are the most common light switches. These are the “trusted model”, the switches that tend to be the default choice, but they don’t offer the same level of versatility as dimmer switches.
Touch switches are the more futuristic option, and run the risk of looking out of place in period properties or rooms. They tend to be suited to more contemporary styles of room, but also come with a higher price, so may not be the best choice for the project.
Much like in other areas of life, you really do get what you pay for. Many people go for cheaper options, but often neglect the overall appearance, as well as the functionality.
Look for products with higher guarantees, as you really want your sockets and switches to last for a long time. Whilst it’s not a huge job to replace them, it’s not quite as simple as re-painting a wall or moving a table, so going for electrical fittings that could break in a year or two may come back to bite you. Aim for at least 5 years.
Whilst there are common finishes that can look the same, even if bought from two different suppliers, many styles of sockets and switches don’t quite look exactly like each other, so be sure to choose a range that has every electrical fitting that you need. You can often use data plates and euro modules to make up the remaining few, but these tend not to look as good as regular sockets and switches, so it’s best not to over-rely on them.[related_products is_auto_added="1"]
Despite not taking up a huge amount of space, sockets and switches can be seen throughout any property, so often play a big part in the appearance, as well as being vital to the functionality. Often overlooked as an afterthought, choosing which sockets and switches to purchase is actually a big decision. In this article, […]
When renovating your home or updating the switches and sockets, you may have to decide on the type of switches to go for. Not only is the finish a big choice (for example, whether to go for brushed chrome, polished chrome, white, black nickel or brass), you may also be unsure about the style of switch to go for.
Whilst choosing between dimmer and rocker switches is a little more simple, rocker switches and toggle switches have exactly the same functionality, so the key consideration is the style. When looking at the wiring requirements, these are identical for both types of switch. Both toggle and rocker switches control electricity the same way, are designed to fit within the same back boxes and can both be interchanged if needed.
Both rocker switches and toggle switches operate in the same way, as they both have a regular on/off function. Toggle switches do, however tend to offer a slightly louder “click” sound when switched on or off, compared to rocker switches.
Rocker switches do tend to be available in more types of switch, for example, 20 amp switches and 45 amp switches, but for general light switches, toggle switches can cover most needs. Although intermediate toggle switches can be more difficult to find, they are available (on Elesi) and can do everything that regular intermediate rocker switches can do.
Whilst the cost of electricity is the same, no matter whether you use toggles or rockers, the price of the actual switch can vary. Toggle switches tend to be more expensive than rocker switches.
This is the main difference between toggles and rockers. Rocker switches are far more universal, fitting in with a wide range of interior design styles. They tend to look more modern, but toggle switches tend to make more of a statement.
Rocker switches are available in every finish, and whilst white plastic toggle switches are available from many stores, it is the metal finishes that really bring out the best in the style of switch. White plastic toggle switches have a retro, 1970s style, but also look far cheaper than chrome, brass or nickel toggle switches.
Rocker switches tend to work well in contemporary and modern decors, with toggle switches fitting in perfectly to more classic and period styles, however this is far from being a hard and fast rule, as you can add a modern twist to a period style with rockers, or a classic addition to a modern interior with a toggle switch. What it really comes down to is the style and appearance, as your room may suit a toggle switch more than a rocker switch, or vice versa.
You can replace a toggle switch with a rocker switch but you will need to replace the mounting yoke/faceplate too.
A toggle switch is a mechanical switch.
[related_products is_auto_added="1"]When renovating your home or updating the switches and sockets, you may have to decide on the type of switches to go for. Not only is the finish a big choice (for example, whether to go for brushed chrome, polished chrome, white, black nickel or brass), you may also be unsure about the style of […]
If you’re choosing downlights for your bathroom, you really need to take great care. There are strict regulations around the sort of lights you can use, and of course, you need to be sure that they are safe. In this article we look at what are IP rated downlights, why they are important, and where you can use them.
IP (in IP Rating) stands for Ingress Progression. This is a simple way of indicating how well protected the light is from external influence. The IP rating determines if an electrical product’s exterior case will protect the working parts from water or solid object intrusion. IP testing should always be performed at an accredited test laboratory and includes repeatedly testing the standards to ensure protection.
Simply for safety. If you are using non-IP rated downlights, there could be a risk that water or solids could get through the casing and into the product wiring. This is especially important, and essential when using downlights in bathrooms.
The IP rating of your downlights relates to where they can be used in the bathroom. Think of the bathroom as being split into different zones, rather than being one whole space. In the image below, we can see the different zones in the bathroom. These relate to the likelihood of water being around the product.
This is inside the bath or the shower itself. Any fitting here must be low voltage (max 12v) and be rated at least IP67 (total immersion proof).
This is the area above the shower or bath, to a height of 2.25m from the floor. Here the minimum rating required is IP46, but it is generally better to go higher - to IP65.
This is the area stretching 0.6m outside of the perimeter of the bath and to a height of 2.25m from the floor. An IP rating of at least IP44 is required here. It is also good to consider the area around a sink, within a 60cm of any tap to be considered as zone 2.
These are anywhere outside zones 0,1 and 2 and where no water jet is likely to be used. There are no specific IP requirements for this zone, however it is recommended that you consider a light with an IP rating of at least 20. If you are likely to use water jets for cleaning, you should use a fitting with a minimum of IP65.
Browse our selection of IP rated downlights.
There is no regulation requirement for kitchen downlights to be IP rated.
In this article we look at what are IP rated downlights, why they are important, and where they can be used.
If you’re currently choosing which downlights you would like to buy, you may be faced with the choice of fire rated or non-fire rated downlights. You may be wondering whether all of your downlights need to be fire rated or just some of them.
Choosing the right downlights can be a bit of a daunting task. So, before deciding, it’s best to know what fire rated downlights are, why and where to use them.
When a hole is cut into your ceiling for your downlight, this creates a potential fire hazard as plaster board ceilings, and other safe ceilings can work as a fire barrier. If there are people living above the ceiling, the ceiling must be fire rated.
A hole in a ceiling could allow fire to spread upwards. Fire rated downlights essentially block the risk by sealing the gap, slowing the damage. Modern fire rated downlights tend to be fitting with an intumescent pad that swells. This blocks the flames when it reaches a certain temperature.
You may have noticed that some downlights are rated at 30, 60 or 90 minutes, or all three. This rating depends on the size and structure of the building. A top floor flat would likely require at least a 90, whilst the bottom floor may need 30 minutes.
Where Should Fire Rated Downlights Be Used?
According to the Electrical Safety Council, fire rated downlights should be used in all ceilings, no matter what type of building in which they are installed.
LED downlights need to be fire rated if they are recessed or semi-recessed as the fire rating of the ceiling would need to be maintained. If they are on the surface of the ceiling, and don’t compromise the plasterboard, the fire rating will not be affected. Therefore the downlights do not necessarily need to be fire rated.
See our LED fire rated downlights.
Our range of fire rated downlights included fixed, tiltable, and even Dim to Warm downlights. Check out our wide range of downlights to find out the best fit for your needs!
Yes, you can match your downlights to your sockets and switches. We have a great range of finishes, including Soho Lighting Co. finishes!
Choosing the right downlights can be a bit of a daunting task, so before deciding, it’s best to know what fire rated downlights are, why to use them and where to use them.
Have you ever wondered how to dim LED lights? If you've tried to dim your LED bulb, but rather than a smooth, silent dim you experience flickering and buzzing, or no dim at all, then you will have a compatibility problem.
In short, it is possible to dim LED lights, however, you need to make sure you have the correct bulbs and the correct switch. Our guide to dimming LED lights will explain everything.
LED bulbs have for a while now been the most energy-efficient and cost-effective way of lighting our homes, offices, and businesses. However, they have suffered from poor aesthetics in the past, mainly due to unattractive plastic bases that cover much of the bulb.
In recent years, more attractive LED bulbs have been brought to the market that are also dimmable, meaning they really are the smarter choice when picking out your light bulbs.
LED bulbs are dimmed using a different method than analogue bulbs. Whilst analogue dimming involves the controlling of the current to dim or brighten the light, LEDs use Pulse Width Modulation (PWM) which involves the light going through a cycle of being on and off, so fast that you won’t be aware of it.
So for a bulb to be 20% dimmer, it would need to be off 20% of the time. To make sure you can dim your LED bulbs, you will need to have the correct bulbs and the correct dimmer.
Unlike incandescent light bulbs, which can generally dim naturally with a dimmer, LED bulbs need to have the capability built-in. So if you are looking to dim LED bulbs, make sure they are dimmable LED bulbs.
The same goes for LED downlights. Be sure to choose dimmable LED downlights if you would like to dim them.
Firstly, whilst some LED bulbs can work with old dimmer switches, it’s generally better to upgrade to a LED suitable dimmer. Most LEDs will flicker with the wrong types of dimmer switches installed. Secondly, an incompatible dimmer switch will cause buzzing, humming, duller brightness, or a premature burnout of the bulb.
You will need to switch to a dimmer that can handle low-wattage LED bulbs, to enhance the longevity of your LEDs. A 250W or a 400W dimmer, and ideally intelligent trailing edge, will allow your LEDs to dim smoothly and effectively.
When choosing a dimmer, it’s also worth choosing a soft-start dimmer switch. These dimmers will allow for the light to switch on slightly slower, rather than pushing the full amount of power to it straight away. They can also improve the longevity of the bulb.
If you are unsure whether you have a compatible LED dimmer, the easiest thing to do is to ask an electrician. However, we have created a quick guide to checking the compatibility of your LED bulbs with your current dimmer to help assist you.
Now you know how to dim LED lights, browse our collection of dimmable LED products below.
[related_products is_auto_added="1"]Have you ever wondered how to dim LED lights? If you’ve tried to dim your LED bulb, but rather than a smooth, silent dim you experience flickering and buzzing, or no dim at all, then you will have a compatibility problem. In short, it is possible to dim LED lights, however, you need to make […]
Chrome plating, more commonly referred to as chrome, is a process in which a thin layer of chromium is electroplated on to a metal object, forming a decorative and corrosive resistant finish. The plating process used to create both polished and brushed chrome finishes is initially identical. Polished chrome is, as the name suggests, polished whereas brushed chrome is brushed, or abraised through finely scratching the surface. The finishes therefore both look and perform differently in day to day use. It is important to understand these differences as it may affect your enjoyment of your decorative switch and socket investment.
Polished Chrome Finish Mirror like reflectiveness |
Brushed Chrome Finish Matt/Satin finish – low reflectiveness |
The finish produced is mirror like (highly reflective) and corrosion resistant, protecting the metal underneath from oxidisation or rust. This finish is often referred to as chrome or polished chrome. While it is easy to clean, it's not always easy to keep clean.
You will be familiar with polished chrome on vintage cars bumpers and many motor bike exhaust pipes.
In the home, polished chrome is frequently found in bathrooms, on taps and towel rails. That is why the polished chrome finish is a popular choice for fittings in a bath and washroom. It is also popular in kitchens that have polished chrome appliances such as kettles and toasters.
Polished chrome finishes are striking and fit with most décor styles, from vintage/period and deco to modern and contemporary. It does not stain or tarnish easily, making it the perfect choice for the kitchen, bathroom or washroom. However, it's not easy to keep clean as fingerprints and water marks build up, needing to be wiped to maintain a flawless finish.
Polished chrome switches and sockets often come with a choice of either black or white insert, giving consumers extra choice concerning their décor matching and styling. Black inserts are often chosen for more modern and contemporary settings, with white inserts often being favoured for a more traditional look and feel.
A brushed chrome finish is achieved by finely scratching the surface of the chrome plate after plating. These fine scratches produce a satin/ matt effect which significantly reduces the reflectiveness of the surface.
This finish is easy on the eye and has the added benefit of obscuring fingerprints and marks. This makes the brushed chrome finish a good choice for busy households and commercial premises with a lot of traffic. Brushed chrome has grown significantly in popularity in recent years and is now the most popular choice of finish. Brushed Chrome switches and sockets work best in modern and contemporary settings, though their subtle appearance compliments most décor styles. They can be purchased with both black and white inserts, which changes the tone and appearance. Black inserts are often preferred in modern and contemporary settings, with white inserts being chosen for more traditional appeal.
There are many terms used in the switch and socket market to differentiate products, however for the most part there is very little if any discernible difference between finishes described as Brushed Chrome, Brushed Steel, Satin Chrome or Satin Steel etc. Indeed, they are generally stainless steel or chrome plated finishes which are then brushed to create a satin or matt finish which does not readily show fingerprints. The tone or huge of a finish may vary slightly depending on the original base colour, however we recently examined finishes across all major brands of switches and sockets that were described as Brushed Chrome, Brushed Steel, Satin Chrome or Satin Steel and there was no consistent pattern to the finish name and the tone/huge. If you are thinking of selecting switches and sockets of this type we would advise you purchase a sample first from a company that accepts returns.
Polished Chrome and Nickel have similar properties and finish. They are both highly reflective and have silver tones. However polished chrome is considered to be colder with a slightly bluer tone. Nickel is warmer with what is considered a slightly yellower/white tone which can give the appearance of ageing. Both are a popular choice for bathrooms and wet-rooms as they do not corrode and match well with polished chrome of nickel fittings such as taps and towel rails.
FAQs
Yes! We stock a wonderful range of Fusion sockets and switches that mix and match different finishes to create a range of different styles. Check out the White Metal and Polished Chrome Fusion range for a contemporary design. We also carry the Matt Black and Brushed Chrome set, which looks fabulous in a minimalist or chic home. Or for something really daring, the Antique Copper and Brushed Chrome offers a wonderful twist on traditional and contemporary, with a true mixed metal appeal.
What is the difference between polished chrome and brushed chrome sockets and switches and why does it matter? Chrome plating, more commonly referred to as chrome, is a process in which a thin layer of chromium is electroplated on to a metal object, forming a decorative and corrosive resistant finish. The plating process used to […]